

Key Takeaways
A window regulator moves the glass, but several electrical and mechanical parts work together to make that movement smooth. Careful diagnosis helps you avoid replacing a good motor or buying the wrong door-specific assembly.
- Slow, crooked, or grinding movement can indicate regulator, guide, or alignment trouble.
- A motor that runs without moving the glass often points to a failed cable or attachment point.
- Confirm the door position, part number, and model-year fit before ordering a replacement.
- Door-panel and glass work require stable support, careful handling, and attention to airbag-related components.
- Recalibration and clean window channels can help prevent repeat problems after service.
Understanding how Tesla Model 3 window regulators work
Tesla Model 3 window regulators are part of a compact door system that raises and lowers the glass inside its guide channels. The window switch, wiring, motor, regulator, glass clamps, and seals all have to cooperate. A fault in one area can look very similar to a fault in another, so understanding the basic layout is useful before buying parts.
The regulator’s role in the window system
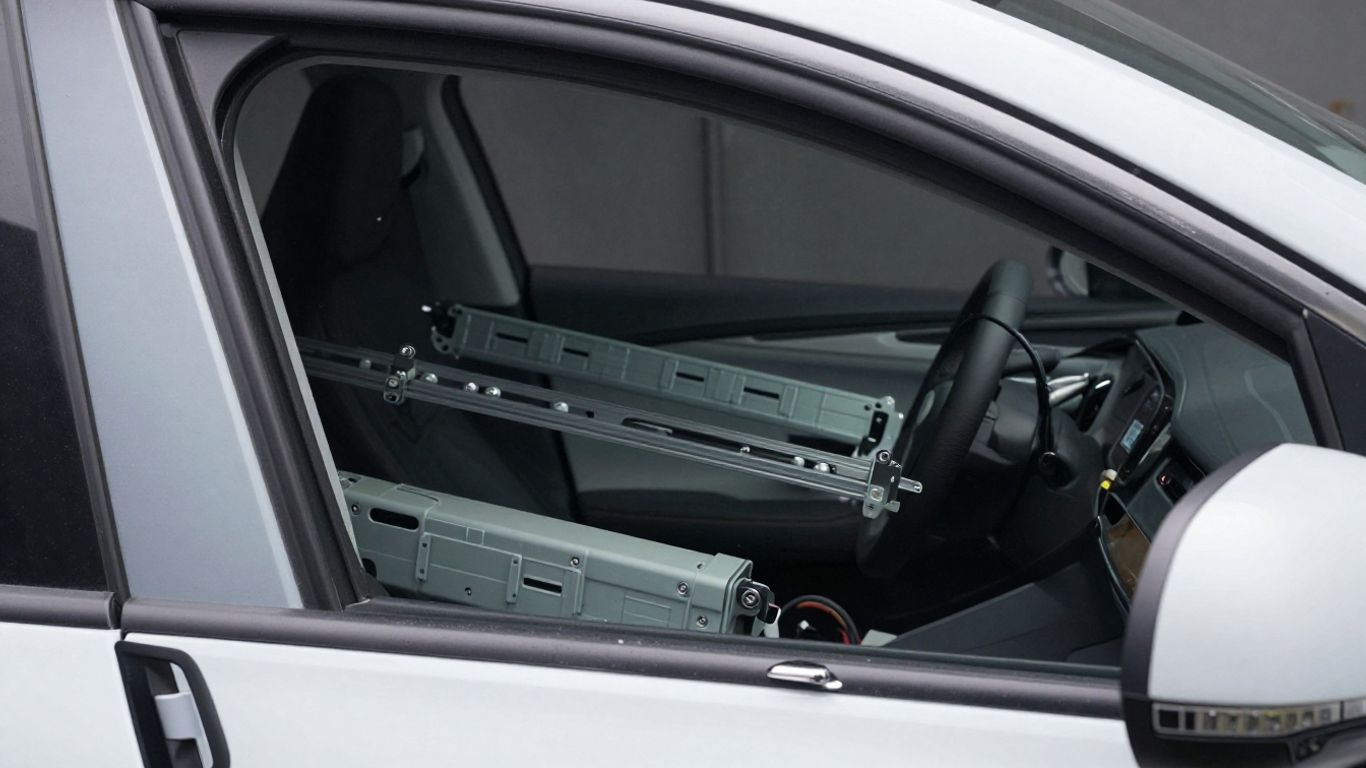
The regulator is the mechanical lifting assembly. It transfers the motor’s rotation into controlled vertical movement, usually through a cable, track, carrier, or related lifting mechanism. Its attachment points keep the glass moving along the intended path rather than allowing it to tilt or fall.
A regulator can wear even when the switch and motor still work. Frayed or slack cable sections, damaged sliders, bent tracks, and loose glass mounts may all produce intermittent operation. The key point is that the regulator supports and guides the glass; it does not simply supply power to it.
How the regulator differs from the window motor
The motor provides the rotary force, while the regulator converts that force into the glass’s up-and-down travel. Some replacement parts are sold separately, but others arrive as a combined motor-and-regulator assembly. That distinction matters when comparing prices and deciding whether the motor has actually failed.
If pressing the switch produces a healthy motor sound but the glass remains still, the mechanical assembly deserves close inspection. If there is no sound, check the electrical path before condemning the regulator. Diagnosis before replacement is usually the least expensive approach.
Front and rear door design differences
Front and rear doors can use different regulator shapes, mounting points, connectors, and service procedures. Left- and right-hand versions are not interchangeable simply because they look similar in a photograph. The door position should be recorded before the panel comes off, especially if the vehicle has had previous repair work.
The front door also contains safety-related components that make careless disassembly risky. A service procedure for a left-hand front motor and regulator assembly includes precautions concerning the door sensor and the need to restore openings in the door shell. That is why front window assembly service information is more useful than a generic window-repair video.
Why frameless windows need precise alignment
Frameless glass moves slightly to clear the upper seal when the door opens and closes. If the regulator, glass clamps, guides, or seals are misaligned, the window may bind, whistle, scrape, or fail to seat correctly. The problem may become more obvious in wet or cold conditions when seals offer more resistance.
Alignment is not just a cosmetic concern. Excessive resistance can put additional load on the cable and motor, while a poor seal can allow water or wind noise into the cabin. Test the glass through its full travel and check its relationship to the seal before reinstalling every trim piece.
Signs your Tesla Model 3 window regulator is failing
Window faults rarely arrive with a single unmistakable symptom. A change in speed, a new noise, or glass that sits unevenly can be an early warning, while a sudden drop is a stronger sign of mechanical failure. Note exactly what happens, including whether the fault occurs on the way up, on the way down, or only after repeated use.
Different symptoms help narrow the search, but they do not replace inspection. A weak power supply, switch fault, damaged guide, or frozen seal can imitate a regulator problem. The following patterns are useful starting points rather than automatic diagnoses.
Slow, uneven, or noisy window movement
A healthy window should travel consistently without pronounced grinding, clicking, or scraping. Hesitation at one point in the travel can suggest resistance in a guide or seal, while a repeated cable-like rattle may indicate trouble inside the regulator. Uneven glass height from one side to the other is another reason to stop cycling the window.
Do not keep holding the switch while the glass strains. Repeated attempts can increase heat in the motor and worsen a cable or slider problem. If the noise changes when you gently support the glass, record that detail for the technician.
Glass dropping into the door
Glass that suddenly sinks into the door usually means that a clamp, carrier, cable, or lifting component has lost control of it. The glass may still be intact, but continuing to operate the switch can allow it to tilt or damage the seal. Covering the opening temporarily can protect the cabin from rain, though tape should not bear the full weight of unsupported glass.
This symptom calls for prompt attention because the glass can break or shift into a position that makes later removal harder. Keep hands clear of the mechanism and avoid reaching into the door without first making the vehicle safe.
A window that is stuck open or closed
A stuck-open window is inconvenient and exposes the interior, while a stuck-closed window can become a problem at toll booths, parking areas, or during service. The cause may be mechanical binding, a disconnected glass mount, a failed motor, a switch, or a control issue. Try to identify whether the motor can be heard before arranging parts.
If the glass is firmly wedged, forcing it by hand can bend the carrier or damage the seal. A technician can often separate the electrical and mechanical possibilities quickly with a meter and a visual inspection.
Symptoms that point to electrical rather than mechanical faults
Electrical faults become more likely when the window is completely silent, several functions on the same door are affected, or operation changes when the switch is pressed repeatedly. A blown fuse, poor connection, damaged wiring, or control-module issue can interrupt the motor even when the regulator is sound.
The opposite pattern—a motor that runs but leaves the glass stationary—leans more toward a mechanical fault. That distinction is not absolute, but it helps prevent an unnecessary parts order. Photographing connector locations before disassembly can also make troubleshooting easier.
How to diagnose a faulty window regulator
Diagnosis should move from simple checks to more involved inspection. Start with the switch and power supply, then listen to the mechanism, and only afterward remove trim to inspect the glass and regulator. This sequence saves time and reduces the chance of disturbing a component that was working.
Keep the vehicle stable, protect painted surfaces, and avoid probing connectors carelessly. If the door contains safety equipment or you are unsure how to isolate the system, professional service is the safer choice.
Checking the window switch and power supply
Operate the window from the relevant switch and note whether other door functions behave normally. Check the vehicle’s approved fuse and power information rather than guessing from a fuse that looks similar. A multimeter can help establish whether power reaches the motor connector during a command.
Do not assume that a working switch proves the regulator is bad. The switch may send a command while a connector, ground, wiring path, or module prevents the motor from responding. Testing at the correct connector and under the correct conditions produces more useful evidence.
Listening for motor and cable noises
Stand close to the door while briefly operating the switch. A quiet system may indicate missing power, while a whirring motor with no glass movement can indicate a disconnected or failed lifting mechanism. Clicking, crunching, or a loose rattling sound suggests that continued cycling may cause more damage.
Use short test commands rather than holding the switch for a long time. That approach limits stress on a jammed mechanism and makes it easier to compare sounds from the beginning and end of travel.
Inspecting the glass, guides, and mounting points
With the door safely opened for service, inspect whether the glass sits level in its channels and whether the clamps or mounting points remain secure. Look for displaced seals, debris, loose fasteners, and signs that the glass has been rubbing. A regulator may be intact but unable to work correctly because the glass or guide has shifted.
A simple diagnostic checklist can keep the inspection focused:
- Confirm the glass is not visibly tilted.
- Check the upper and lower channels for debris or deformation.
- Look for loose, missing, or displaced fasteners.
- Inspect connectors and wiring for strain or damage.
After these checks, compare the findings with the original symptom rather than replacing parts based on noise alone. A guide obstruction and a broken cable can feel similar from the driver’s seat, but they require different remedies.
Using Tesla service information and diagnostic tools
Manufacturer service information can clarify the correct order of panel removal, isolation steps, fastener locations, and alignment checks. It may also identify warnings that are absent from general repair articles. Use the procedure for the exact door and vehicle configuration, not one that merely looks close.
A service scan tool or appropriate diagnostic interface can help identify electrical faults, but it cannot replace a physical check of the glass and regulator. For a useful comparison, review the window regulator diagnostic guide when organizing a fault-finding process, while treating any generic guidance as supplementary.
The video placeholder can be useful alongside written instructions, especially for visualizing trim removal. Still, fasteners, connectors, and safety precautions should be verified against the applicable service information.
Choosing the right replacement regulator
Replacement selection begins with the door, side, and vehicle configuration. A part that fits one position may have a different bracket or connector in another. Before ordering, compare the old assembly, the seller’s fitment data, and the vehicle’s identification information.
Price alone is a poor guide. The lowest-cost part may require transferring a motor or correcting an alignment issue, while a complete assembly may reduce installation time. The sensible choice depends on the confirmed failure and the quality of the part source.
Matching the regulator to the door position
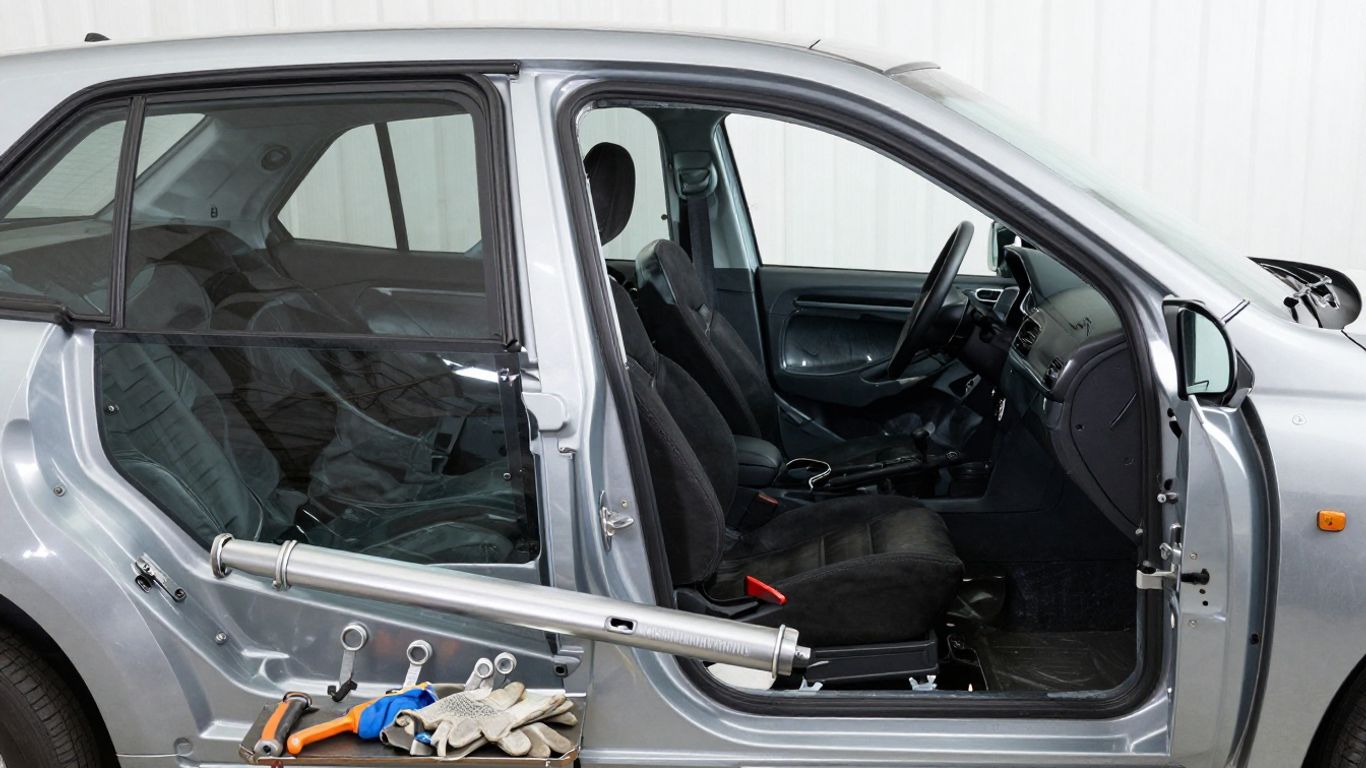
Record front or rear and left or right before searching. Also check whether the listing includes the motor, glass carrier, cable, mounting hardware, or only a bare regulator. Photographs can help, but connector shape and mounting-hole positions are more reliable than appearance alone.
A front-right listing, for example, should not be treated as a universal Model 3 regulator. The front-right replacement unit is presented for that specific position, which illustrates why side and door designation belong in the purchase decision.
Comparing OEM, aftermarket, and used assemblies
An original-equipment assembly may offer familiar fitment, while an aftermarket unit can cost less or address a known weakness in the original design. A used assembly may be economical, but its cable, sliders, and motor have already experienced wear. Warranty terms, return policies, and seller verification matter as much as the headline price.
Some aftermarket assemblies are marketed with revised cable tensioners, deeper reel channels, or installation features intended to reduce derailment. The OE FIX lift-motor assembly is one example of a listing that describes those design changes. Treat such claims as product-specific, and confirm fitment before relying on them.
Verifying part numbers and model-year compatibility
Part numbers can change during a production run, and a superseded number may still require confirmation before installation. Match the number on the removed component when possible, then check the seller’s compatibility notes for the exact door. If the vehicle has been modified or repaired after an accident, physical comparison becomes even more valuable.
Keep the old part until the replacement has been tested. If the new unit is wrong, the original number and connector can help resolve the return or identify the correct revision.
Deciding whether a motor and regulator assembly is necessary
Replacing the complete assembly makes sense when the motor and lifting mechanism are sold together, when the motor has also been damaged, or when labor to separate the components outweighs the savings. A bare regulator may be reasonable when the motor tests correctly and the mounting arrangement supports a clean transfer.
The direct replacement regulator is described as a plug-and-play front-right unit for certain Model 3 vehicles through 2023. That does not make every similar-looking part compatible; confirm the stated range and the vehicle’s actual configuration before purchase.
How to replace a Tesla Model 3 window regulator
Replacement involves more than unbolting an old part and installing a new one. The glass must be supported, the door trim removed without damage, and the mechanism aligned before the system is tested. Work slowly, label connectors, and protect the glass from sudden movement.
The exact fasteners and isolation procedure depend on the door. A professional procedure should take priority over a generalized walkthrough, particularly where the door’s sensor and airbag system are involved.
Tools and replacement parts to prepare
Prepare trim tools, protective tape, suitable sockets, a driver, gloves, a stable glass support, and the confirmed replacement assembly. Keep a container for fasteners and a camera nearby for documenting connector and cable routing. Damaged clips and seals should be replaced rather than forced back into service.
Do not improvise a support from an unstable object. The glass is heavy enough to move suddenly, and a falling pane can damage the door or injure someone nearby.
Removing the door panel safely
Follow the vehicle-specific isolation and trim-removal procedure. Release clips at their intended points, disconnect electrical connectors without pulling on wires, and place the panel on a protected surface. Keep track of screws that differ in length or position.
Before exposing the inner door, note any plugs, seals, or protective coverings that must be restored. Openings left uncovered can affect the door’s water management and safety-related sensing, so reassembly is part of the repair rather than an afterthought.
Supporting and disconnecting the window glass
Raise the glass to a workable position if possible, then support it securely before loosening its clamps or separating it from the regulator. Use protection that will not scratch the glass or paint. Never rely on the motor or cable to hold the pane while fasteners are being removed.
Once disconnected, keep the glass vertical and out of the mechanism’s path. Inspect the clamp contact areas and guide channels while access is available; replacing a regulator without correcting a damaged guide can lead to the same symptom soon afterward.
Installing, aligning, and testing the new regulator
Install the assembly loosely enough to allow the initial alignment specified by the service procedure, then secure the fasteners to the correct specification. Reconnect the glass carefully and check that it sits evenly in both channels. Cycle it in short steps while watching for binding, unusual noise, or seal distortion.
Before completing the panel installation, test full travel, door operation, and the window’s relationship to the upper seal. If the glass moves unevenly, stop and correct the alignment rather than hoping repeated cycling will settle it.
Tesla Model 3 window regulator repair costs and decisions
Repair cost depends on the failed component, part availability, access time, and the shop’s labor rate. A motor-only issue may be handled differently from a damaged cable-and-track assembly, while broken clips, seals, or glass can add to the estimate. Ask for the diagnosis and parts scope in writing.
A useful estimate separates the part, labor, diagnosis, and any calibration or trim-related work. For general budgeting habits, the roof repair or replacement comparison is an unrelated example of why a repair-versus-replacement decision should be based on condition, not just the first quoted price.
Typical parts and labor cost factors
The largest variables are whether the part is bare or complete, whether it is new or used, and how much disassembly the door requires. A shop may also charge for diagnosis before replacement. Shipping, warranty coverage, and return handling can change the final cost of a supposedly inexpensive part.
When comparing estimates, make sure each one covers the same door position and assembly scope. A cheap regulator without a motor is not directly comparable with a complete motor-and-regulator unit.
When repair is better than full replacement
Repair may be sensible when the issue is a loose connector, displaced guide, or minor mounting problem and the regulator itself is undamaged. Full replacement is more appropriate when a cable has frayed, a carrier has broken, or the mechanism has been bent. The decision should follow inspection rather than the age of the vehicle alone.
Ask whether the proposed repair addresses the cause or merely restores movement temporarily. A small saving is not worthwhile if the glass remains misaligned or the same stressed cable is returned to service.
Comparing Tesla service with an independent shop
Compare experience with this door system, access to accurate service procedures, diagnostic capability, warranty terms, and willingness to explain the estimate. A manufacturer-affiliated service center may have direct familiarity with the vehicle, while an independent shop may offer different scheduling or labor options. The best choice is the one that can document the work and protect the vehicle during disassembly.
Online research can help you judge whether a local shop communicates clearly. Even a local visibility guide can remind business owners why accurate service information and trustworthy customer communication matter, though it is not a repair manual.
Estimating the risks of a DIY repair
DIY work can reduce labor expense, but the risk is not limited to breaking a clip. Unsupported glass, damaged wiring, incorrect fastener placement, poor alignment, and unrepaired door-shell openings can create further cost. Stop if the procedure calls for tools, isolation steps, or access you cannot perform confidently.
Before choosing to work at home, consider these practical questions:
- Can the glass be supported safely throughout the job?
- Do you have the correct procedure for this door?
- Can you verify electrical faults rather than guess?
- Can you align and recalibrate the window afterward?
If any answer is no, a qualified shop may be cheaper than correcting a failed DIY installation. Keep the estimate, part number, and old assembly so the repair remains traceable.
Preventing future window regulator problems
A regulator works in a demanding environment inside the door, where moisture, dust, temperature changes, and repeated loading are normal. Prevention is mostly about reducing friction and avoiding forces the mechanism was not designed to absorb. Small habits also make early symptoms easier to spot.
After any door or battery service, test the window before finishing the job. A short check can reveal a loose connector or lost calibration while the tools are still out.
Keeping window channels clean and lubricated
Dirt in the channels increases resistance and can make the glass move slowly or unevenly. Clean visible debris with a suitable method and use only a lubricant compatible with the seals and manufacturer guidance. Excess product can attract more dust and contaminate the glass.
Inspect the channels when the window is fully accessible, but do not force a cloth or tool into a narrow guide. If resistance returns quickly after cleaning, investigate alignment or seal damage instead of repeatedly adding lubricant.
Avoiding pressure on partially open glass
Do not lean on the window, push sideways against it, or close the door while the glass is being held at an angle. Frameless glass needs room to move and can transfer side loads into the clamps and regulator. Ice or a frozen seal can create similar stress during operation.
If the glass is frozen, clear the seal area and wait for it to release rather than repeatedly pulling the switch. Gentle operating conditions are kinder to both the cable and motor.
Protecting the door from moisture and debris
Keep door seals and protective barriers correctly seated after service. Missing plugs or torn coverings can let water reach components and can interfere with the door’s intended drainage paths. Avoid directing high-pressure water at gaps that have been opened during repair.
When a panel is removed, inspect the vapor barrier and door-shell openings before closing everything up. A clean, sealed door is less likely to turn a small regulator issue into a wider electrical or corrosion problem.
Recalibrating the window after service or battery work
The window may need relearning after the battery has been disconnected or the regulator has been replaced. Follow the vehicle-specific calibration procedure and watch the glass while it learns its upper and lower positions. If it stops early, reverses, or fails to seal, do not treat calibration as a substitute for alignment.
Successful recalibration should leave the glass moving smoothly and seating consistently. If it does not, return to the mechanical and electrical checks rather than repeatedly cycling the switch.
Conclusion
A careful diagnosis is the foundation of any window-regulator repair: distinguish electrical silence from mechanical noise, match the replacement to the correct door, support the glass securely, and verify alignment before reassembly. With clean channels, protected door components, and proper recalibration, a repaired window can return to dependable everyday operation.
Frequently Asked Questions
What does a window regulator do?
It converts the motor’s rotational force into controlled movement that raises and lowers the glass while keeping it aligned in the door.
Can a bad window motor look like a bad regulator?
Yes. A silent window may have an electrical or motor fault, while a running motor with stationary glass more often suggests a mechanical problem. Testing is needed to separate them.
Why does a window move slowly or unevenly?
Possible causes include dirty channels, seal resistance, misalignment, a damaged guide, cable wear, or a weakening motor. The symptom alone does not identify one failed part.
Should the motor and regulator be replaced together?
Not always. A separate regulator can be appropriate when the motor tests correctly, but a complete assembly may be more practical when both components are worn or sold together.
Is replacing a window regulator a DIY job?
It can be manageable for an experienced technician with the correct procedure and supports, but unsupported glass, wiring, trim, and alignment create real risks for inexperienced repairers.
How can I tell whether a replacement part will fit?
Confirm the front or rear position, left or right side, connector, mounting points, part number, and model-year compatibility. Compare the old assembly before discarding it.
What should I do if the window drops into the door?
Stop operating the switch, keep hands away from the mechanism, protect the opening from weather, and arrange an inspection. Further cycling may damage the glass or regulator.