
Key Takeaways
A Model S battery cooling system is a connected thermal circuit, not one isolated component. Understanding its parts and testing method helps prevent an expensive guess-and-replace repair.
- Coolant circulation keeps battery and drivetrain temperatures within a usable operating range.
- Pumps, hoses, valves, sensors, radiators, and heat exchangers can all affect thermal performance.
- Charging limits, reduced power, leaks, and unusual pump sounds deserve prompt investigation.
- Compatibility depends on the car’s year, battery configuration, and component revision.
- High-voltage isolation, correct bleeding, and post-repair checks are essential for safe service.
How the Model S battery cooling system works
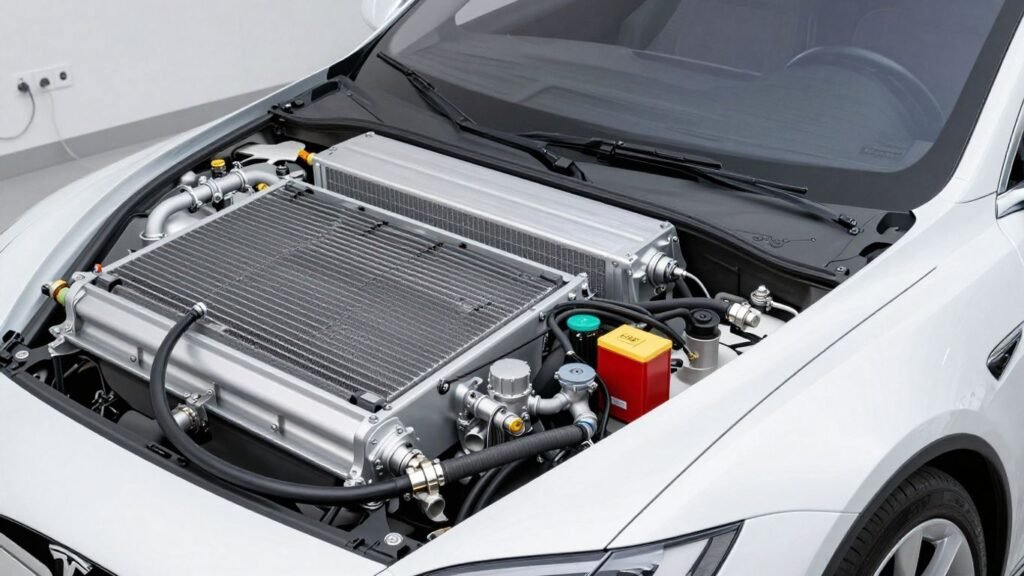
The Model S uses liquid thermal management to move heat away from components that warm during driving and charging. The circuit may include several paths and control points, so a fault in one area can affect another. A useful overview of the architecture is available in this battery cooling guide, but the car’s exact plumbing still needs to be confirmed by build and service information.
The role of coolant in battery temperature control
Coolant carries heat from the battery and other thermal loads toward a radiator, heat exchanger, or chiller. It also helps distribute temperature more evenly rather than allowing isolated hot areas to develop. The correct fluid, concentration, cleanliness, and fill level all matter; air in the circuit can be just as disruptive as a low level.
A cooling system is not simply trying to make every component as cold as possible. It is trying to keep temperatures controlled and predictable under changing loads, which is why preconditioning and charging behavior can change when the system detects a problem.
How the battery pack, power electronics, and drive unit share thermal management
The battery pack, power electronics, and drive unit each generate heat, and thermal management coordinates their cooling and heating needs. Pumps and valves direct coolant through the path that needs attention, while heat rejection occurs through external components. This arrangement means a complaint that appears during acceleration may still involve a circulation or routing fault rather than the battery itself.
The system can also move useful heat between components in some operating conditions. That is why diagnosis should consider the complete circuit instead of treating the pack as a standalone radiator loop.
Cooling plates, channels, and heat-transfer paths inside the pack
Within the pack, cooling structures sit close to the battery modules and provide a route for heat to leave the cells. The exact design varies with pack revision, but the diagnostic principle is consistent: restricted flow, damaged connections, or poor contact can reduce heat transfer even when the reservoir appears full.
Because much of this hardware is enclosed, external symptoms often provide the first clue. A technician may need vehicle-specific service information before deciding whether an issue is an external hose, a connection, or an internal pack assembly.
Why temperature balance affects range, charging, and battery life
Battery output and charging behavior depend partly on temperature. If the system cannot control heat, the vehicle may limit charging or power to protect the battery and associated electronics. That protective response does not, by itself, prove that the pack has failed.
Owners comparing charging expenses can also consult this Tesla charging cost guide, but charging cost and cooling-system health are separate questions. A slower session may reflect temperature management, charger conditions, battery state of charge, or several factors together.
Key Tesla Model S battery cooling parts
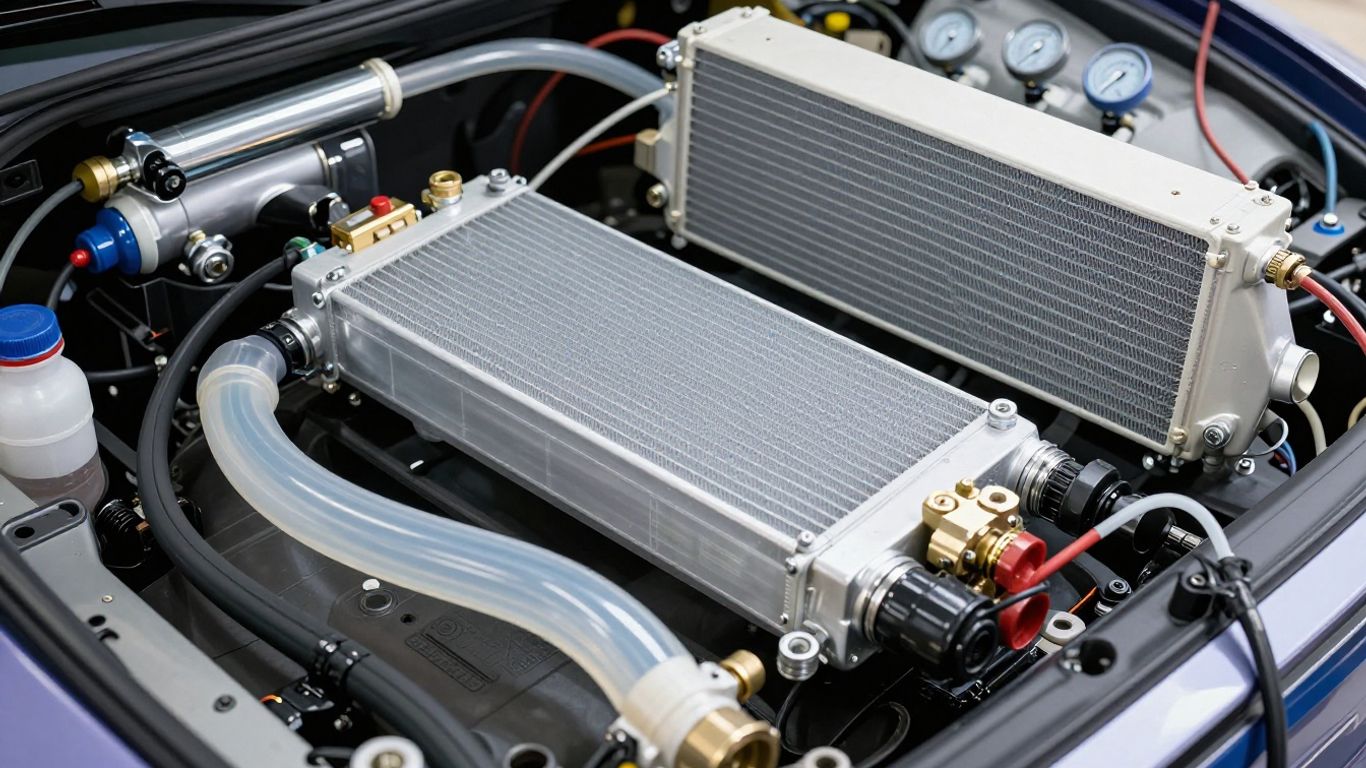
The phrase “tesla model s battery cooling parts” covers a surprisingly broad group of service items. Some are inexpensive external pieces, while others require extensive disassembly and high-voltage precautions. The right starting point is the fault evidence, not the most dramatic component in the system.
Coolant pumps and how circulation is maintained
An electric coolant pump creates the flow needed to move fluid through the selected thermal path. Wear, electrical faults, trapped air, or a restricted circuit can reduce circulation. A pump that runs does not necessarily provide correct flow, so sound alone should not be treated as a conclusive test.
When replacement is being considered, compare the connector, mounting arrangement, hose size, and revision rather than relying only on a general model description. The pump should be tested in the context of the complete circuit.
Hoses, pipes, fittings, and quick-connect points
Flexible hoses and rigid pipes connect the pack, pumps, valves, and heat-rejection hardware. Their joints are common inspection points because seals can flatten, fittings can loosen, and plastic or aluminum parts can age. Dried coolant may leave a colored or chalky residue even when an active drip is not visible.
A historical account of early leakage concerns is available as Model S leak reporting. It should be treated as background, not as a diagnosis of any individual vehicle; the practical response is a careful inspection of the car in front of you.
Valves, manifolds, and coolant-routing hardware
Valves and manifolds determine where coolant flows and when different thermal paths are connected. A valve that sticks, leaks internally, or receives an incorrect command can imitate a weak pump. Manifolds also create several seals and junctions where a small leak may gradually lower system pressure.
Parts used in conversions and other applications can help illustrate the variety of pumps, valves, sensors, and chillers, as discussed in this thermal component overview. They are not automatically interchangeable with parts fitted to a Model S.
Radiators, heat exchangers, and other heat-rejection components
Radiators release heat to outside air, while heat exchangers and chillers transfer heat between fluid and refrigerant or another controlled medium. Blocked airflow, damaged fins, contamination, or a related fan fault can reduce heat rejection without any visible coolant leak.
The external location of these components makes them relatively accessible for inspection, but access does not make every repair simple. Check for impact damage, debris, wetness, and signs of previous work before ordering an assembly.
Temperature sensors and thermal-control electronics
Sensors report temperatures that the control system uses to decide when to run pumps, open valves, or limit charging. A sensor that reads implausibly high or low can trigger protective behavior even when the coolant path is intact. Wiring, connectors, and grounds therefore belong in the inspection alongside the sensor itself.
A complete diagnostic record should compare reported temperatures with conditions at the time of the complaint. Replacing a sensor without checking its circuit can leave the original fault untouched.
Symptoms of battery cooling system problems
Cooling faults rarely present in exactly the same way on every Model S. The first clue may appear during fast charging, hard acceleration, hot weather, or a long climb. Treat symptoms as evidence to organize, not as permission to name a failed part immediately.
Warning messages, reduced power, and charging limitations
A thermal warning, reduced-power message, or unexpected charging limitation indicates that the vehicle is protecting itself or has detected an abnormal condition. Record the wording, time, outside temperature, state of charge, and what the car was doing. That context can be more useful than a vague description such as “it felt hot.”
Do not repeatedly force high-load operation to reproduce a warning. If power is limited or charging is interrupted, arrange diagnosis before assuming the problem is ordinary battery aging.
Coolant leaks, low levels, and visible residue
A low reservoir level, damp joint, puddle, or dried residue points toward a loss of coolant, though the source may sit above or behind the visible mark. Inspect after the vehicle is safely parked and cool. Never open a hot reservoir or reach around energized high-voltage equipment.
Small leaks can become larger when pressure and temperature rise. A clean-up followed by a controlled reinspection is often more informative than simply topping up the fluid and moving on.
Overheating during fast charging or sustained driving
A car that performs normally on short trips but limits power during sustained use may have a flow or heat-rejection problem. Fast charging creates a particularly useful comparison because the thermal load changes over time. Repeated limitations should be documented rather than dismissed as a charger issue.
However, ambient heat, charger output, battery state of charge, and route elevation can also influence behavior. Diagnosis should compare similar events and use measured data wherever possible.
Unusual pump noises and inconsistent cabin or battery heating
A new whine, grinding sound, pulsing noise, or repeated pump cycling can indicate wear, air, restriction, or a control issue. Cabin heating changes may occur at the same time because several thermal functions can share hardware or coolant-routing decisions. The two complaints may be related, but they should not be assumed to have one cause.
Note whether the sound occurs at startup, while charging, after shutdown, or only under load. Timing often helps separate normal system operation from an emerging fault.
How symptoms vary by Model S generation and battery pack
Model year, battery size, drive-unit configuration, and revision can change the component layout and expected readings. Early and later vehicles should not be diagnosed from a single generic parts diagram. A part number that fits one pack may be wrong for another even when the body style looks identical.
For that reason, save the vehicle identification details before ordering anything. The Model S cooling overhaul guide offers a useful repair-planning angle, including the need for high-voltage isolation and proper lifting practices, but vehicle-specific documentation remains decisive.
How to diagnose cooling system faults
Good diagnosis moves from simple observations to controlled tests. Begin with safety and visible evidence, then use scan data and pressure testing to narrow the fault. Guessing between a pump, valve, sensor, and pack assembly can turn a small repair into an unnecessary system replacement.
Checking coolant level and inspecting common leak points
With the vehicle cool and safely secured, inspect the reservoir, pump housings, hose ends, manifolds, radiator connections, and any area showing dried residue. Check whether the level is stable and whether the fluid appears contaminated. Do not mix unknown fluids merely to bring the level up.
A flashlight, clean inspection surface, and photographs of suspect areas make follow-up easier. If coolant has entered an area near high-voltage components, stop and obtain qualified assistance rather than continuing with exploratory disassembly.
Reading diagnostic codes and thermal-management data
Diagnostic codes can identify an electrical fault, implausible sensor signal, insufficient flow condition, or thermal limitation. They are clues, not verdicts. Compare codes with live temperatures, pump commands, charging behavior, and the time at which the symptom appears.
Useful observations should be recorded in a repeatable sequence:
- Battery temperature readings before and during the event.
- Pump command or operating status, where available.
- Coolant temperature changes across the relevant path.
- Charging power, state of charge, and ambient conditions.
That record helps distinguish a real thermal event from a one-time communication or sensor anomaly. It also gives a repairer a clearer baseline for confirming the fix.
Pressure testing the system without damaging components
A pressure test can reveal a slow external leak that is difficult to see during normal operation. Use the correct equipment, adapter, pressure limit, and test procedure for the vehicle; excessive pressure can damage seals or components that were not designed for it. The system should be isolated appropriately before testing.
Pressure loss should be paired with a visual inspection and, where appropriate, an approved leak-detection method. Never use a test as a substitute for high-voltage safety or manufacturer procedure.
Distinguishing battery cooling faults from HVAC or drive-unit issues
The air-conditioning circuit, cabin heater, drive unit, and battery circuit can influence one another without sharing every component. A weak cabin cooling complaint may involve refrigerant or HVAC hardware, while a charging limitation may point toward battery thermal management. Correlate the symptom with operating mode instead of grouping every temperature complaint together.
Comparing the car at rest, during charging, and under road load can clarify the pattern. The goal is to identify which loop is failing before removing parts.
When professional Tesla-specific diagnostics are necessary
Professional help is appropriate when warnings persist, coolant reaches high-voltage areas, the pack must be opened, or scan data requires proprietary interpretation. High-voltage isolation and lifting procedures are not areas for improvisation. A specialist can also confirm revisions and perform the controlled bleed and verification steps that follow component replacement.
Bring the recorded symptoms, photographs, codes, and service history. Evidence before parts is a simple rule, but it prevents many expensive misdiagnoses.
Choosing replacement parts for a Model S
Selecting a replacement is a compatibility exercise as much as a price comparison. The same-looking hose, pump, or valve may have a different connector, calibration, mounting point, or revision. Before purchase, identify the failed item and understand what labor is required to reach it.
Confirming compatibility by model year, battery size, and revision
Verify the vehicle identification number, model year, battery capacity, drive configuration, and the number printed on the existing component. Supplier listings can be incomplete, so compare photographs and connector details only as a secondary check. The correct part should match the vehicle’s documented configuration and revision.
If the diagnosis is uncertain, buying several possible parts usually creates more risk than flexibility. Confirm the fault first, then order against a specific repair plan.
Comparing Tesla OEM, remanufactured, and aftermarket components
An original component may offer the closest match to factory fit and specification, while a remanufactured part can be appropriate when its testing and warranty are clear. Aftermarket parts vary widely, so evaluate the supplier’s documentation, return policy, and application data rather than assuming a lower price means equal performance.
The choice should reflect the component’s role and the difficulty of replacing it. A small external hose and an assembly requiring major access should not be evaluated by the same standard.
Evaluating seals, connectors, and one-time-use hardware
A repair can fail again when an old seal is reused, a connector is damaged, or a specified one-time fastener is treated as ordinary hardware. Inspect mating surfaces and replace associated seals when the procedure calls for it. Keep parts clean and capped until installation.
These small items are easy to omit from an order, yet they can determine whether the repaired circuit remains dry and properly sealed.
Matching parts to the repair scope instead of replacing unnecessary assemblies
A confirmed leaking fitting does not automatically justify replacing a pump, valve block, or battery pack. Conversely, a component that is inaccessible without major disassembly may merit a broader inspection while the area is open. The repair scope should follow evidence, access, and the manufacturer’s procedure.
Ask for the test that supports the proposed replacement. A clear explanation is more valuable than a long list of speculative parts.
Balancing price, warranty coverage, and long-term reliability
Compare the complete cost: part, shipping, labor, fluid, seals, diagnostic time, and the consequences of a repeat failure. A short warranty may be acceptable for a low-risk external item but less attractive for a difficult-to-access assembly. Keep invoices and part numbers for future service.
A modest saving is not worthwhile if the component has uncertain fit or cannot be returned after installation. Reliability is part of the purchase price, not an optional extra.
Replacing and maintaining battery cooling components safely
Cooling-system service combines ordinary fluid handling with electric-vehicle hazards. The car must be secured, the high-voltage system isolated according to approved procedure, and the correct lifting points used. If any step is unfamiliar, stop before opening the circuit.
Preparing for coolant-system service and high-voltage isolation
Read the service procedure before disconnecting a hose or removing a cover. Wear suitable protective equipment, keep ignition sources and contamination away from the work area, and verify that the vehicle cannot move. High-voltage isolation is a defined process, not simply switching the car off.
Use insulated tools and follow the specified wait and verification steps. A cooling repair near the pack should be treated as high-risk even when the visible part is only a hose.
Managing coolant draining, bleeding, and contamination risks
Capture drained coolant in a clean, labeled container and dispose of it responsibly. Use only the specified fluid and avoid introducing dirt, water, or incompatible chemicals. After reassembly, bleeding must remove trapped air without allowing the reservoir to run dry.
Air pockets can cause poor circulation and misleading temperature behavior. A correct fill is therefore part of the repair, not a cosmetic final step.
Inspecting nearby high-voltage wiring before reassembly
Before closing the work area, inspect nearby cables, connectors, shields, and fasteners for abrasion, moisture, or accidental movement. Do not tug on orange high-voltage cables or treat their color as proof that a circuit is safe. Any damage or unexplained coolant intrusion requires qualified evaluation.
Keep hose routing away from sharp edges, moving parts, and hot surfaces. Correct clips and supports matter because vibration can turn a good repair into a later leak.
Verifying circulation, pressure, and temperature after repair
Run the approved post-repair procedure and check for leaks while the system reaches operating conditions. Confirm that pumps respond, temperatures change as expected, and the reservoir level remains stable after cool-down. Clear codes only after recording them and understanding why they appeared.
A short road test may be appropriate when the system passes stationary checks, followed by another inspection. Do not declare success solely because the warning disappeared.
Maintenance practices that help prevent repeat cooling failures
Routine care is mostly observation rather than scheduled part replacement. Keep the front heat-rejection area clear, respond promptly to residue or low fluid, and record changes in charging or power behavior. Avoid topping up with an unknown coolant just to continue driving.
A sensible maintenance habit includes:
- Checking for new wetness or dried deposits after service.
- Keeping repair records with part revisions and fluid details.
- Investigating repeated charging limits instead of ignoring them.
- Scheduling a professional inspection when warnings return.
These steps cannot prevent every component failure, but they can shorten the time between a small clue and a controlled repair. They also make future diagnosis less dependent on memory.
Conclusion
A Model S cooling fault is easier to manage when the system is viewed as a network of pumps, passages, valves, sensors, and heat-rejection components. Careful symptom recording, configuration-specific parts selection, and safe high-voltage procedures protect both the vehicle and the person servicing it. When the evidence points beyond a simple external repair, qualified diagnosis is the sensible next step.
Frequently Asked Questions
What are the main Tesla Model S battery cooling parts?
The main parts include coolant pumps, hoses, pipes, fittings, valves, manifolds, radiators, heat exchangers, sensors, and associated control hardware. Exact contents and revisions vary by vehicle configuration.
What can cause a battery cooling warning?
Possible causes include low coolant, an external leak, weak circulation, a stuck valve, a sensor or wiring fault, restricted heat rejection, or trapped air. A warning requires testing rather than immediate parts replacement.
Can a coolant leak damage the battery pack?
It can, particularly if fluid reaches electrical or high-voltage areas. Stop driving when a significant leak or coolant intrusion is suspected and arrange a safe inspection.
Why might fast charging become slower?
Charging may be limited when the battery is outside its preferred temperature range or when thermal management detects a fault. Charger conditions, battery state of charge, and ambient temperature can also affect speed.
How can I tell whether a pump is failing?
Noise, poor circulation, repeated thermal warnings, and abnormal temperature changes can point toward a pump issue, but none proves it alone. Scan data and controlled testing are needed for confirmation.
Should old coolant be reused after a repair?
Reuse is appropriate only when the approved procedure and fluid condition allow it. Contaminated, mixed, or improperly stored coolant should not be returned to the system.
When should cooling-system work be handled by a professional?
Use a qualified technician when the repair involves high-voltage isolation, pack access, coolant intrusion near electrical components, persistent warnings, or uncertainty about bleeding and post-repair verification.