

Key Takeaways
A careful diagnosis usually costs less than replacing several parts by guesswork. The same basic process applies whether the vehicle is only sagging overnight or will not raise at all.
- Check for leaks before condemning the compressor.
- Compare ride height at all four corners on level ground.
- Treat suspension work as a lifting and stored-energy safety job.
- Get a written estimate that separates parts, labor, and related damage.
- Recheck ride height, fasteners, and warning messages after repair.
Understanding the Model X air suspension system
The Model X uses air pressure rather than conventional coil springs to support the vehicle. Its control system can alter ride height for clearance, comfort, and changing road conditions. A fault may therefore appear as a height problem, a noisy compressor, a warning message, or a change in ride quality. Understanding the system makes the later diagnosis more orderly.

How the adaptive air suspension works
Air suspension uses flexible air springs, pressurized air, valves, lines, and height feedback. When the vehicle needs to rise, the compressor supplies air through the valve block; when it needs to lower, air is released through the appropriate circuit. The control system compares intended height with sensor feedback and adjusts pressure as needed.
That process is not instantaneous. Cold temperatures, a small leak, low voltage, or a compressor that is losing efficiency can all make height changes slower. A single symptom rarely identifies one failed part by itself.
Key components and their roles
Each part has a different job, which is why diagnosis matters. The air spring supports the corner, the lines carry compressed air, and the valve block directs that air. The compressor creates pressure, while height sensors report the position of the suspension to the control system.
The reservoir, fittings, wiring, and control electronics also matter. A worn fitting can imitate a failed air spring, and a damaged sensor link can create a height complaint even when the air circuit is intact. Inspect the entire system rather than focusing on the loudest component.
Common suspension height settings
Drivers may select different height settings depending on road surface, clearance, and speed. A higher setting can help with steep driveways, while a lower setting may be selected for highway driving. The vehicle may also change height automatically under certain conditions.
Always compare symptoms at a known setting. If the vehicle is parked at a different height each time, it becomes harder to tell whether one corner is actually losing pressure. Record the selected height, parking surface, outside temperature, and time before drawing conclusions.
Why air suspension problems can affect ride quality
A leak or pressure imbalance changes how much support a corner provides. That can make the vehicle feel harsh, floaty, tilted, or less settled over bumps. A weak compressor may leave the system operating below its intended pressure, while a faulty sensor can cause repeated corrections.
Ride quality can also be affected by tire pressure, alignment, worn bushings, or wheel damage. Diagnosis should follow the symptom, not assume every unusual ride comes from the air suspension.
Recognizing signs of an air suspension problem
Early symptoms are often easier to spot after the vehicle has been parked for several hours. Measure what changed rather than relying only on memory: note the gap between each tire and fender, listen during startup, and photograph any visible lean. Patterns over several days are more useful than one isolated observation.
Vehicle sagging or lowering overnight
A slight, even change in height can occur as pressure equalizes, but a noticeable drop at one corner deserves attention. Repeated compressor operation after startup is another clue that the system is restoring lost pressure. The overnight lowering guide is useful for separating a uniform change from a corner-specific sag.
Do not keep cycling the suspension to make the symptom disappear. Frequent correction can place extra demand on the compressor and obscure the original leak. Park on level ground and measure all four corners before and after the same interval.
Uneven ride height from side to side
A side-to-side difference may come from an air spring leak, a height sensor issue, a damaged line, or a mechanical problem. Look for a visibly collapsed corner, but also check whether the steering wheel is straight and whether the tires are equally inflated.
If the vehicle remains uneven after selecting a normal ride setting, avoid carrying a heavy load or driving quickly. A measured difference gives a technician something concrete to reproduce and test.
Slow lifting or failure to raise
A vehicle that rises slowly may have a compressor that is weak, a restricted air path, a valve problem, low system voltage, or a leak large enough to defeat the compressor. A complete failure to raise is more urgent, especially if the body is close to the tires or road surface.
Record whether the failure affects one corner or the whole vehicle. That distinction helps separate a local air circuit problem from a pressure-generation or control problem.
Compressor noise and suspension warnings
Some compressor noise is expected during a height change. A compressor that runs for an unusually long time, starts repeatedly, or sounds strained is different. Pair the sound with the vehicle’s height, warning messages, and recent repair history.
A warning does not automatically identify the failed part. Save the exact wording and any available code before clearing anything. If the vehicle is sitting low, drive only as far as necessary to reach a safe repair location.
Diagnosing Tesla Model X air suspension faults
Diagnosis works best as a sequence: confirm the symptom, inspect for obvious damage, test the air circuit, and then interpret electronic data. A shop should explain what was tested and why the proposed repair follows from those results. Replacing a compressor before checking for a leak can simply create a second problem later.
Checking for air leaks
Start with a visual inspection of air springs, fittings, and exposed lines. A leak may be audible, but small leaks are often easier to find with an appropriate leak-detection solution and a controlled pressure test. Check the vehicle at a consistent height and follow safe service procedures.
Look for a corner that drops after parking, bubbles at a fitting, or compressor cycling that returns soon after the vehicle is raised. A leak location should be confirmed before a part is ordered.
Inspecting air springs and suspension lines
Air springs can deteriorate at folds and connection points. Lines may rub against nearby components, become kinked, or suffer damage from road debris. Inspect routing, clips, unions, and molded sections rather than examining only the visible portion near the wheel.
The air line repair procedure illustrates why line damage must be measured and assessed before cutting. A repair is appropriate only when the remaining line can meet the required quality; otherwise, replacement is safer than forcing a marginal connection.
Testing the compressor and valve block
A compressor test should consider pressure-building time, electrical supply, current demand, and whether the system can hold pressure afterward. If the compressor runs but the vehicle does not respond correctly, the valve block or a downstream leak may be involved.
The compressor replacement guide shows that this is not a casual underbody task: preparation includes lifting the vehicle, entering service mode, deflating the reservoir, and disconnecting 12V power. Those steps belong in a trained technician’s procedure, not a shortcut checklist.
Using diagnostic alerts and scan data
Scan data can reveal sensor readings, commanded height, compressor activity, and stored faults. It should support physical testing rather than replace it. A code may identify an abnormal condition without proving which hardware caused it.
Ask for the measured evidence: which corner changed height, how long pressure took to build, and whether the fault returned after clearing. That information makes a repair estimate more transparent and helps prevent unrelated parts from being bundled into the job.
Choosing the right repair for each failed component
The correct repair depends on the failed component and the condition of neighboring parts. A leaking air spring calls for a different remedy than a damaged line or a sensor that has lost calibration. Before approving work, ask whether the technician found the root cause and whether the repair includes a post-service leak and height check.
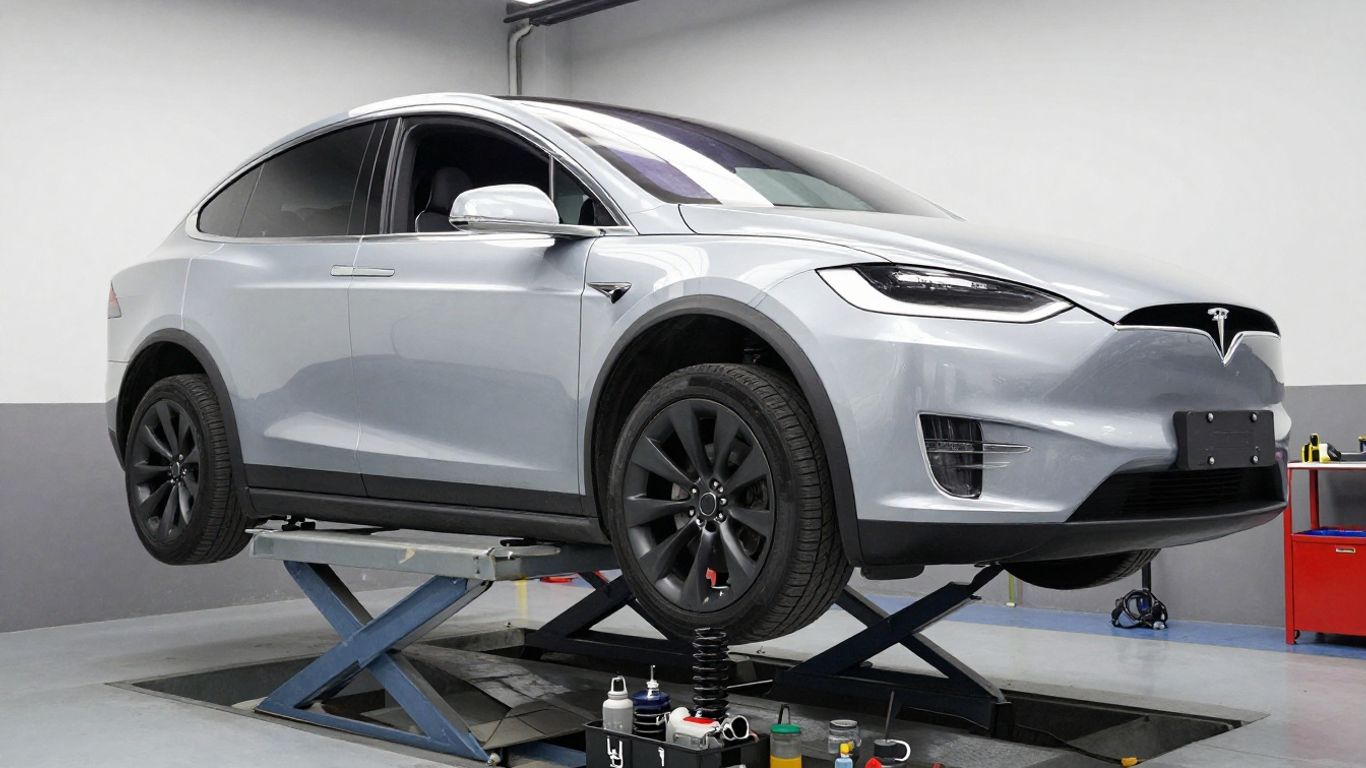
Replacing a leaking air spring module
A leaking module is generally replaced when its bag, crimp, fitting, or integrated structure cannot reliably hold pressure. The replacement must be installed with the vehicle supported correctly and fasteners tightened according to the applicable service procedure. The front air spring module guide specifically calls out replacing designated locking hardware and tightening suspension fasteners at ride height on a 4-post lift.
After installation, inspect the connection, restore the system carefully, and confirm that the corner reaches and holds its intended height. If the compressor has been overworked by the leak, it should also be evaluated rather than assumed healthy.
Repairing damaged air suspension lines
A line can sometimes be repaired when the damaged section is limited and there is enough sound material for a proper union. The cut must be clean, the routing must avoid renewed rubbing, and the connection must be checked under pressure. A fully cut or badly compromised line may need replacement instead.
Do not conceal a damaged line with tape or a loosely fitted connector. The repair should restore the pressure circuit, preserve clearance from moving parts, and remain accessible for future inspection.
Replacing a weak or failed compressor
Compressor replacement makes sense when testing shows that the unit cannot build pressure correctly or has an internal electrical or mechanical failure. It is not the first answer to every warning or slow lift. A leak downstream can make a good compressor appear weak by forcing it to run continuously.
Once the compressor is replaced, test the reservoir, valve block, lines, and air springs. Otherwise, the new unit may be exposed to the same demand that damaged the old one.
Servicing the valve block and height sensors
A valve block may stick, leak internally, or fail to direct air to the commanded corner. Height sensors can have damaged links, wiring faults, or readings that do not match the vehicle’s actual position. Both require testing against the symptom and scan data.
A sensor replacement may require calibration or a ride-height verification afterward. If the vehicle remains uneven, do not assume the electronic fault was the only issue; recheck the mechanical and pneumatic components too.
Tesla Model X air suspension repair costs
The price of repair varies widely because the fault may be a small fitting, a line, an air spring, a compressor, or a combination of parts. Labor also depends on access, testing time, local rates, and whether the vehicle can be safely lifted. A useful estimate explains the diagnosis instead of presenting one unexplained total.
Typical parts and labor expenses
Parts generally account for the largest difference between a minor line repair and a major component replacement. Labor rises when the failed component is difficult to access or when the system needs extensive testing before and after installation. Taxes, shop supplies, alignment, and calibration may be separate.
Use a written estimate that identifies the suspected component, the test supporting it, and any recommended related inspection. Online repair cost planning can help organize questions about estimates, although marketing guidance is not a substitute for a vehicle inspection.
Factors that influence the final estimate
The vehicle’s model year, suspension configuration, component availability, and regional labor rate can all affect the bill. Previous repairs may also matter if a line was routed poorly or a fitting was disturbed. A vehicle that has been driven while sitting low may have additional tire or underbody concerns.
When comparing estimates, confirm that both include the same work. One quote may cover only a part, while another includes diagnosis, installation, pressure testing, calibration, and a final road test.
OEM and aftermarket replacement options
Replacement choices should be judged by fit, material quality, warranty, and the supplier’s technical support. The least expensive part is not necessarily the least expensive repair if it leaks early or requires repeat labor. Ask whether the part is new, remanufactured, or used and what the warranty excludes.
For readers comparing available components, Model X air suspension parts is one source of aftermarket information. Treat any product description as a starting point and verify compatibility with the vehicle before purchase.
When a complete suspension system inspection is worthwhile
A complete inspection is sensible when the vehicle has multiple symptoms, a compressor has run excessively, or one failed component has already been confirmed. It is also worthwhile when the vehicle has high mileage, visible corrosion, or a history of repeated height warnings.
The goal is not to replace every aging part automatically. It is to identify connected faults while the system is already accessible, then separate urgent repairs from items that can be monitored.
| Finding | Likely next step | Cost concern |
|---|---|---|
| One corner drops while parked | Confirm leak location | Air spring, fitting, or line labor |
| Whole vehicle rises slowly | Test pressure generation | Compressor and electrical testing |
| Vehicle stays uneven | Compare sensor data and height | Sensor, linkage, or air circuit |
| Repeated warnings after repair | Recheck system integrity | Possible unresolved root cause |
This comparison is only a triage guide, not a diagnosis. The final estimate should follow a pressure test, physical inspection, and review of the vehicle’s stored data.
Deciding between DIY and professional repair
Some owners can handle observation, measurements, and basic visual checks. Pressurized suspension components and a heavy electric vehicle create a different level of risk once lifting, deflation, electrical isolation, or component removal begins. Be honest about the equipment available and the procedure you can follow precisely.
Repairs that may be suitable for experienced owners
An experienced owner may be comfortable checking tire pressure, documenting overnight height changes, inspecting visible lines, and using an approved leak-detection method without disturbing pressurized hardware. These steps can make a professional diagnosis faster. They should not be confused with replacing an air spring or compressor.
Stop if the vehicle must be lifted, the air reservoir must be deflated, or a connection will be opened. The CEON Foundation is unrelated to vehicle service, but its terms are a useful reminder that using any online material still leaves the reader responsible for following applicable instructions and limits.
Tools and safety precautions for home repairs
Safe work requires a level surface, suitable lifting equipment, correctly rated supports, eye protection, gloves, and a procedure specific to the vehicle. Keep hands clear of stored air pressure and never rely on a jack alone. Disconnecting power or entering service mode should follow documented instructions.
Before starting, gather the following rather than improvising at the vehicle:
- A vehicle-specific service procedure.
- Correct lifting and support equipment.
- Eye protection and cut-resistant gloves.
- A leak-detection method and measuring tools.
These basics do not make every repair appropriate for home service. They simply reduce avoidable mistakes during inspection and preparation.
Risks of lifting and supporting a Model X
Incorrect lift points or inadequate supports can damage the vehicle or allow it to move unexpectedly. Air suspension height can change while the vehicle is being serviced, and a component may release stored pressure when disconnected. Wheels, body panels, and underbody parts can also be damaged by poor positioning.
Never work beneath a vehicle supported only by a floor jack. If the correct lift, adapters, or support points are not available, stop and arrange professional service.
When to use a Tesla service center or specialist
Use a service center or experienced specialist when the vehicle will not raise, a warning returns after repair, pressure must be safely released, or scan data and calibration are required. A specialist should be able to explain the test results and provide a repair warranty.
Choose the shop based on equipment, familiarity with air suspension, and willingness to document the work. A low initial quote is less useful if it omits diagnosis or post-repair verification.
Preventing future air suspension problems
Prevention is mostly careful observation and timely maintenance. Air suspension faults often become more expensive when a small leak forces the compressor to run repeatedly or when a low vehicle is driven over rough ground. A simple record of height behavior can reveal change before a breakdown.
Maintaining correct tire pressure and ride settings
Check tire pressure with a reliable gauge and keep all four tires matched to the vehicle’s recommended pressures. Use a sensible height setting for the road and avoid leaving the vehicle in an unnecessarily high setting when it is not needed. Tire pressure and ride height should be checked together when handling feels unusual.
Consistent settings also make future comparisons meaningful. If the vehicle is always parked at the same selected height, a new overnight drop is easier to identify.
Protecting suspension components from road damage
Avoid deep potholes, road debris, and contact with steep driveway edges whenever possible. After driving through debris or a deep impact, inspect the visible lines, wheel areas, and underbody for fresh damage. Keep dirt from accumulating around fittings during routine cleaning.
Protection cannot prevent every failure, but it can reduce rubbing and make a developing problem easier to see.
Responding quickly to warning signs
A corner that sags, a compressor that cycles repeatedly, or a new warning should be investigated promptly. Do not repeatedly raise and lower the vehicle just to test whether the message disappears. Photograph the height and record the conditions while the symptom is present.
If the vehicle is too low for safe travel, arrange transport rather than risking contact between the tire, suspension, and road. Quick action may also limit compressor damage.
Scheduling inspections after major suspension repairs
After a major repair, confirm that the vehicle holds height, reaches each selected setting, and produces no recurring warning. Ask the shop to inspect nearby lines, fittings, sensor links, and fasteners while the repaired area is accessible. A short follow-up can catch a routing or connection issue before it becomes a roadside failure.
Keep invoices, diagnostic codes, photographs, and measured heights together. Clear records help a technician distinguish a new symptom from the original fault.
Conclusion
Tesla model x air suspension repair is most predictable when the symptom is measured, the air circuit is tested, and the repair is matched to the failed component. A careful inspection may cost more at the beginning, but it can prevent repeated parts replacement and protect the compressor from unnecessary strain. When lifting or pressurized components are involved, professional help is usually the safer choice.
Frequently Asked Questions
How can I tell whether overnight lowering is normal?
A small, even change may occur, but a noticeable drop at one corner or repeated compressor operation suggests a fault that should be inspected.
Can I drive with one corner of the vehicle sagging?
Driving while the vehicle sits unusually low can create tire, wheel-well, and suspension risks. Have the condition assessed and arrange transport if clearance is unsafe.
Does a suspension warning always mean the compressor failed?
No. A warning can relate to a leak, valve block, height sensor, wiring, pressure issue, or control fault. Testing is needed before choosing a part.
How long does an air suspension repair take?
Time depends on the component, access, diagnosis, parts availability, and whether calibration or additional repairs are needed.
Should I replace both air springs at once?
Not automatically. The other side should be inspected for age and condition, then replacement should be based on evidence, wear, and the owner’s repair priorities.
What should a repair estimate include?
It should identify the suspected fault, diagnostic labor, parts, installation, testing, calibration if applicable, taxes, warranty terms, and any optional recommendations.
How can I reduce the chance of another suspension failure?
Maintain tire pressure, avoid impacts, respond to sagging or repeated compressor cycling quickly, and schedule a follow-up inspection after major repairs.