

Key Takeaways
Wheel hubs connect the wheel to the suspension and, on driven wheels, to the drivetrain. Correct diagnosis matters because tire noise, brake drag, and worn suspension parts can resemble a failing hub.
- Confirm the vehicle’s year, trim, drivetrain, and wheel position before ordering a replacement.
- Listen for changes in humming or grinding as the vehicle turns and changes speed.
- Check for looseness, rough rotation, impact damage, and abnormal tire wear.
- Use correct support, tools, fastener procedures, and torque specifications during replacement.
- Recheck the repair with a careful road test rather than assuming the noise is gone.
Understanding Tesla Model 3 wheel hubs
Tesla Model 3 wheel hubs are compact, load-bearing parts that let each wheel rotate while connecting it to the surrounding suspension. Their design and hardware vary with the wheel position and drivetrain. A hub problem can affect noise, steering feel, braking stability, and wheel-speed information, so it deserves more than a quick visual glance.
What the wheel hub does in the suspension and drivetrain
The hub carries the wheel and supports the vehicle’s weight through its bearing. It attaches to the steering knuckle or rear suspension upright, while the wheel fastens to the hub face. On a driven axle, a halfshaft passes through the hub and transfers motor torque to the wheel; on a non-driven corner, the hub still supports rotation and houses the wheel-speed sensing arrangement.
Because the hub sits at the meeting point of several systems, a fault may show up in more than one way. A rough bearing can create a road-speed hum, while a bent hub or damaged mounting surface may contribute to vibration. The wheel and brake rotor also depend on the hub face being clean and properly seated.
How wheel hubs differ from wheel bearings and hub assemblies
A wheel bearing is the rolling element that allows the hub to turn with low friction. The hub is the wheel-mounting body, and a hub assembly commonly combines the hub, bearing, seals, and sometimes an integrated wheel-speed sensor. Many modern replacement parts arrive as a preassembled unit rather than as separate serviceable components.
The terminology matters when ordering parts. A listing that says “bearing” may refer to a bearing alone, while “hub assembly” usually indicates a more complete replacement. Compare the supplied photographs, mounting holes, flange dimensions, sensor arrangement, and included fasteners with the part being removed.
Differences between front, rear, left-side, and right-side hubs
Front hubs work within steering knuckles and must accommodate steering movement. Depending on the drivetrain, they may also carry a driven halfshaft. Rear hubs are mounted in the rear suspension and may have different hardware, sensor routing, and axle requirements. Left and right parts can appear similar while differing in backing, cable routing, or application details.
Do not assume that one corner’s part automatically fits another. A useful reference is this Model 3 wheel hub kit, whose application information distinguishes front and rear use across listed AWD and RWD vehicles. Treat any catalog fitment as a starting point, then verify it against the vehicle identification number and service information.
Recognizing wheel hub and bearing problems
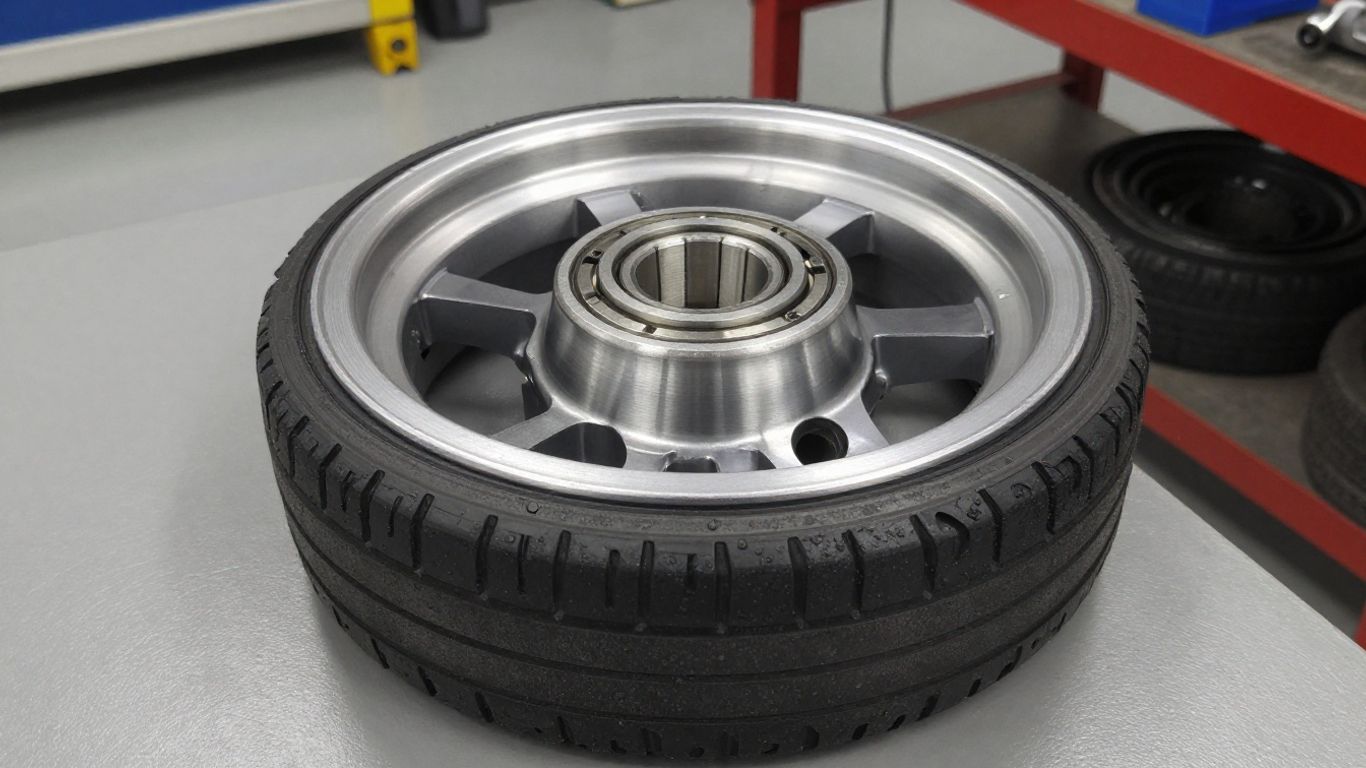
Hub and bearing symptoms often build gradually. The first clue may be a faint hum that becomes more noticeable on longer drives, followed by vibration or looseness. Since several rotating and suspension parts can produce similar sensations, the pattern of the symptom is more useful than any single noise description.
Humming, grinding, and other noise patterns
A worn bearing commonly produces a humming, growling, or rumbling sound that rises with road speed rather than motor speed. The tone may change when the vehicle loads one side during a gentle bend. Grinding, scraping, or clicking can also come from a brake shield, loose hardware, tire, or joint, so noise alone does not prove hub failure.
Listen on a smooth, quiet road with the windows partly open. Avoid sharp steering inputs and keep the test controlled. A noise that changes with pavement texture may be tire-related, whereas a steady sound that follows vehicle speed deserves a closer hub inspection.
Wheel play, vibration, and uneven tire wear
Excessive bearing clearance can produce detectable movement when the wheel is rocked by hand, although some faults make noise before they create obvious play. A warped brake rotor, wheel imbalance, damaged tire, or bent rim may cause vibration at a particular speed. Uneven tire wear can point toward alignment or suspension trouble rather than the hub itself.
The most useful approach is to compare symptoms across corners and inspect the complete assembly. Look for a loose wheel, displaced balance weight, damaged tread, leaking brake component, or marks suggesting an impact. A repeatable symptom pattern is stronger evidence than a single uncertain sensation.
Warning signs that require immediate inspection
Stop treating the issue as routine when there is pronounced grinding, sudden looseness, a wheel that does not rotate smoothly, smoke or unusual heat, or a vibration that rapidly worsens. A damaged hub can compromise wheel control, and a loose wheel or brake component can create a more immediate hazard.
Have the vehicle inspected before further driving if a warning appears alongside these symptoms. Do not rely on the absence of a dashboard message; mechanical wear may be present without a clear electronic alert.
Choosing the correct replacement hub
Fitment is more than matching a vehicle name in an online catalog. Model year, production date, trim, drivetrain, axle position, and the exact hub design all matter. The safest purchase is one supported by the vehicle identification number or a verified part number, with the old component available for physical comparison.
Matching the hub to the Model 3 year and trim
Start with the vehicle identification number and confirm whether the catalog covers the specific production range. Check the front or rear position and whether the part is left- or right-specific. Do not substitute a visually similar hub merely because the wheel bolt pattern looks correct.
Production changes can affect flange dimensions, bearing design, sensor details, and fasteners. If a supplier lists a date boundary, take it seriously and verify the change using service documentation. The Tesla charging cost guide is unrelated to hub fitment, but it is a useful reminder that even closely named vehicle variants can have different specifications; here, the comparison must remain mechanical and exact.
Comparing rear-wheel-drive and dual-motor applications
Rear-wheel-drive and dual-motor vehicles may differ in which wheels are driven and in the hardware required around the hub. A driven hub must accommodate the halfshaft and its retaining hardware, while a non-driven position may use a different arrangement. Dual-motor front and rear applications should therefore be checked separately rather than treated as one universal fit.
Use the drivetrain designation from the vehicle records, not a guess based on exterior appearance. A dual-motor front hub procedure illustrates why front driven-hub work can involve axle hardware, brake removal, and specialized extraction equipment.
Checking ABS sensors, bolt patterns, and included hardware
Confirm the wheel-mounting pattern, hub diameter, flange height, bearing dimensions, sensor configuration, connector position, and mounting-bolt arrangement. Also check whether the replacement includes seals, bolts, screws, nuts, or other one-time-use hardware. A hub that fits the knuckle but cannot connect correctly to the wheel-speed system is not a complete solution.
Catalog photographs can be helpful, but they are not enough on their own. Compare measurements and connector details, and ask the supplier to confirm the exact application when the listing combines several years or drivetrains.
When an OEM, aftermarket, or used hub makes sense
An original-equipment replacement may be preferred when exact fitment, known sourcing, or warranty support is the priority. A reputable aftermarket assembly can be reasonable when its dimensions, sensor compatibility, load rating, and warranty are documented. A used hub is a higher-risk choice because its prior mileage, impact history, and bearing condition may be unknown.
Price should be considered alongside labor. Replacing an uncertain low-cost part twice can exceed the cost of one well-verified assembly. For appearance-related wheel changes, Model 3 wheel accessories are a separate category from safety-critical hub components and should not be confused with a hub replacement.
Diagnosing a suspected hub failure
Diagnosis should move from simple observations to targeted checks. Begin with the driving symptom, then inspect the wheel, tire, brakes, suspension, and hub as one system. A quiet test drive followed by a safe lifted-vehicle inspection is usually more informative than replacing parts by guesswork.
Road-test methods for isolating wheel noise
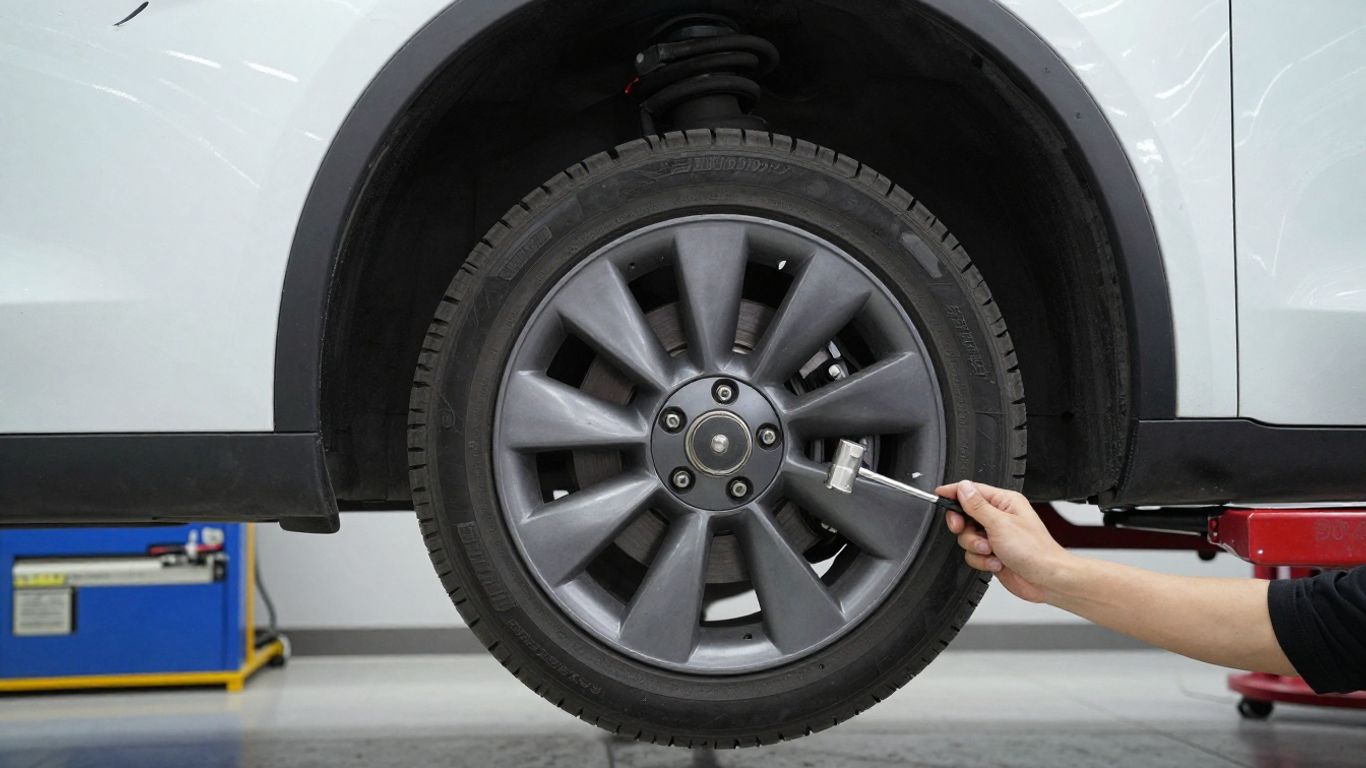
Choose a smooth road with little traffic and note whether the sound follows vehicle speed, acceleration, braking, or road texture. At a safe speed, make gentle lane-position changes without abrupt steering. If the sound changes as load transfers from one side to the other, that observation can help identify the affected corner, though it is not conclusive by itself.
Record when the noise starts and whether it is present during coasting. Tire tread patterns can create a similar drone, and an uneven road can mask a bearing sound. A second person listening from the passenger seat can help, but the driver should keep attention on control of the vehicle.
Lifted-vehicle checks for looseness and rough rotation
Support the vehicle on correctly rated stands or use professional equipment; never work beneath a vehicle held only by a jack. With the wheel secured as appropriate, check for abnormal movement and rotate it by hand. Listen and feel for roughness, binding, scraping, or a notch as the assembly turns.
Compare the suspect corner with the opposite side. Inspect the brake rotor, backing plate, tire, rim, ball joints, and suspension links before deciding that the hub is at fault. Some bearing failures show little play, while some apparent play originates elsewhere.
Using scan tools and inspection data to confirm the fault
A scan tool may reveal wheel-speed sensor faults or inconsistent speed data, but an electronic code does not automatically identify a failed bearing. Inspect the sensor connector, wiring, tone-generating features, and physical mounting area. A mechanical inspection remains necessary when the symptom is noise without a stored fault.
Write down the measured findings: which corner moves, whether rotation is rough, what the sensor reports, and whether the tire or brake shows damage. A structured record keeps the repair decision tied to evidence. For a repair business, broader field service management guidance can help organize scheduling and inventory, but it does not replace vehicle-specific diagnosis.
Avoiding misdiagnosis from tires, brakes, and suspension parts
Rotate or swap known-good components only when safe and appropriate, and inspect tread wear before condemning a hub. Check for a dragging brake, loose shield, bent rim, separated tire belt, worn suspension joint, or alignment issue. A noise that changes dramatically with pavement type is especially suspicious for tires rather than bearings.
The goal is not to prove a hub is bad from one clue. It is to rule out nearby causes and confirm that the suspected assembly explains the complete symptom pattern.
Replacing Tesla Model 3 wheel hubs
Hub replacement is a safety-critical repair involving wheel fasteners, brake components, and sometimes a driven axle. The exact sequence and torque values vary by position and vehicle configuration. Use the current service procedure for the vehicle being repaired rather than relying on a generic video or remembered specification.
Tools, safety precautions, and preparation
Prepare a suitable jack or lift, axle stands where applicable, wheel chocks, torque tools, hand tools, penetrating fluid if permitted, and an appropriate hub puller. Wear eye protection and gloves, and plan for seized hardware. Photograph cable routing and component positions before removal so the replacement can be installed without pinching a sensor lead.
Disconnect or secure components according to the applicable procedure. Keep the work area clean, label removed hardware, and avoid hammering directly on precision surfaces. If the hub is seized in the knuckle, forcing it without the proper method can damage surrounding parts.
Removing the wheel, brake components, and axle hardware
Loosen wheel fasteners while the vehicle is safely supported as directed, then remove the wheel and brake components that obstruct access. On a driven corner, axle-nut removal and halfshaft handling require particular care. Do not let a brake caliper hang by its hose, and protect the sensor wiring throughout the process.
The left rear hub replacement procedure documents why position-specific instructions matter, including safety precautions, changing torque information, and the possibility of a seized hub requiring additional work. Supplemental video can orient a technician, but written steps and current specifications control the repair.
Installing and torquing the new hub correctly
Clean the mating surface without removing material that establishes alignment. Seat the replacement squarely, route the sensor cable as originally positioned, and install the specified hardware in the correct order. Tighten fasteners with calibrated tools and use the current torque and discard-or-reuse instructions for that exact vehicle.
Avoid lubricants or debris on surfaces where they could prevent the hub from seating fully. A replacement that looks flush but is not properly seated can create runout, noise, or premature wear. Refit the brake components and wheel carefully, ensuring every retaining part is accounted for.
Post-repair checks, calibration, and road testing
Before driving, verify that the wheel turns freely, the brake pedal feels normal, and no cable or hose is trapped. Lower the vehicle using the proper sequence, torque the wheel fasteners, and clear any service-related alerts only after the mechanical work is complete. Follow any required sensor or driver-assistance calibration procedure for the vehicle.
Begin the road test slowly in a safe area. Check for new noise, pulling, vibration, brake drag, and warning messages, then recheck the work if anything feels abnormal. The repair is not finished merely because the old hub has been removed.
Maintaining Tesla Model 3 wheel hubs
Hubs are not usually maintenance items with a simple fixed replacement interval. Their service life depends on load, road conditions, water and salt exposure, tire and wheel condition, and impact history. Regular inspections are more useful than replacing a quiet, tight hub on an arbitrary schedule.
How wheel alignment and tire condition affect hub life
Correct alignment helps tires wear evenly and reduces irregular loads through the wheel and suspension. Maintain tire pressure, investigate cupping or scalloping, and repair vibration promptly. A damaged tire or bent wheel can make a healthy hub sound defective and may also transmit unnecessary shocks into the assembly.
After alignment work or tire replacement, note any change in noise or steering feel. A camping light guide has no direct bearing on vehicle repair, but its practical focus on choosing equipment for the job is a useful general principle: use the right tool and specification rather than improvising around a critical component.
Preventing corrosion around the hub and mounting surface
When a wheel is removed, inspect the hub face and the wheel’s mating surface for rust scale, dirt, or damage. Clean only with methods appropriate for the surfaces, and keep friction faces free of excess lubricant. Corrosion between the hub and wheel can cause uneven seating and make later removal difficult.
Avoid coating brake friction surfaces or sensor components. If corrosion is severe, measure or inspect the affected parts instead of simply covering the problem.
Inspecting hubs after pothole impacts or wheel changes
A hard pothole strike can bend a rim, damage a tire, disturb alignment, or stress the hub and suspension. Look for a new hum, vibration, pull, visible wheel damage, or looseness after the impact. After seasonal wheel changes, check fastener condition, wheel seating, and sensor-wire routing.
A short inspection is worthwhile even when the vehicle still drives normally. Catching a damaged tire or loose hardware early is safer and usually less expensive than waiting for a progressive symptom.
Understanding repair costs, warranty coverage, and replacement timing
Total cost includes the hub, hardware, labor, diagnosis, seized-part complications, and any follow-up alignment or calibration. Warranty terms differ by supplier and may exclude damage from impact, incorrect installation, or unrelated parts. Keep the invoice, part number, and diagnostic findings so a warranty question can be assessed clearly.
Replace a hub when inspection supports the diagnosis, not simply because a vehicle has reached a certain mileage. The same careful approach applies to unrelated household planning topics such as protecting a home from care fees: understand the conditions, document the decision, and obtain qualified advice when the consequences are significant.
Conclusion
Tesla Model 3 wheel hubs deserve careful fitment checks, symptom-based diagnosis, and disciplined installation. By separating bearing noise from tire, brake, and suspension problems—and by using the correct procedure for the exact corner—you can make the repair safer, more predictable, and easier to verify.
Frequently Asked Questions
How long do wheel hubs usually last?
There is no universal service interval. Hub life varies with mileage, road impacts, water and salt exposure, tire condition, vehicle load, and part quality, so inspection should be guided by symptoms and measured condition.
Can a bad wheel bearing be driven on?
A mild, confirmed noise may allow only limited travel to a repair facility, but pronounced grinding, looseness, heat, or worsening vibration calls for immediate inspection and may make driving unsafe.
Does a humming tire sound like a bad hub?
Yes. Cupped or irregularly worn tires can create a steady road-speed hum. Compare the sound on different pavement, inspect tread wear, and check the hub and tire together before replacing either part.
Can wheel alignment cause hub noise?
Alignment problems more commonly cause pulling and uneven tire wear, but the resulting tire pattern can sound like a bearing. Correcting alignment will not repair a mechanically worn hub.
Should the hub and bearing be replaced together?
Many vehicles use an integrated hub assembly, making replacement of the complete unit the normal approach. Confirm the part design and follow the supplier’s and vehicle’s service instructions.
What should be checked after hub replacement?
Check wheel seating, fastener torque, brake operation, sensor wiring, warning messages, free rotation, and road-test behavior. Reinspect the work if there is new noise, vibration, pulling, or heat.
Is a used wheel hub a good option?
A used hub can cost less, but its mileage, impact history, corrosion, and bearing condition may be unknown. A documented new part with verified fitment generally reduces uncertainty for a safety-critical repair.