
Key Takeaways
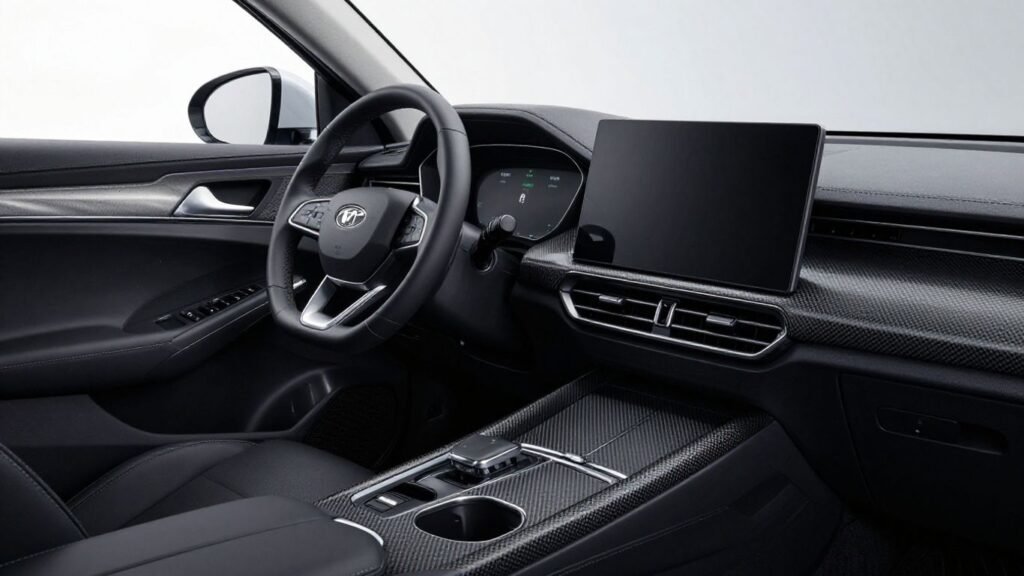
Upgrading your Tesla’s cabin brings a fresh, personalized aesthetic that can make your daily drive feel entirely renewed. This guide explores the materials, tools, and processes required to achieve a flawless finish.
- Aesthetic Choice: Decide between sporty carbon fiber and classic wood grain based on your personal style.
- Finish Decisions: Match matte looks for glare reduction or choose gloss for an ultra-premium, reflective sheen.
- Quality Sourcing: Look for suppliers that guarantee high UV resistance and robust material durability.
- Essential Tooling: Always use plastic pry tools and dedicated surface preparation cleaners to preserve original components.
- Methodical Execution: Work patiently to align adhesive backings and unclasp factory clips without force.
Understanding the different types of interior trim replacements
Upgrading the cabin of your vehicle is one of the most rewarding ways to customize your driving experience. Selecting the right materials ensures that your investments not only elevate visual appeal but also stand up to daily use. By familiarizing yourself with the distinct characteristics of each finish type, you can confidently choose the styling direction that aligns with your vehicle’s overall character.
Carbon fiber versus wood grain aesthetics
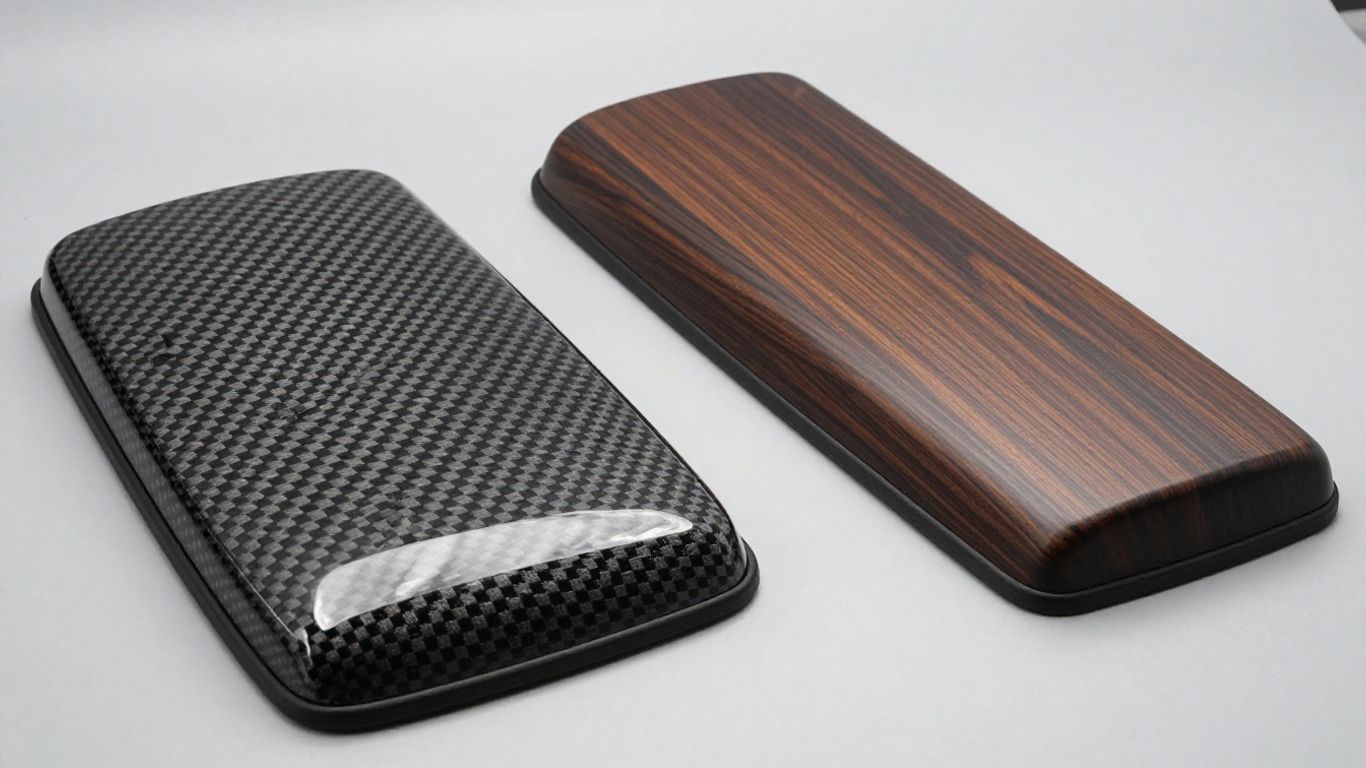
Carbon fiber lends a modern, athletic look that mimics high-performance sport vehicles. Many Tesla owners gravitate toward this performance-oriented styling because it complements the minimalist, futuristic design of the dashboard. On the other hand, real wood grain brings an organic, warm elegance back into the cabin, appealing to those who prefer traditional luxury textures. Choosing between these two directions defines the entire interior theme of your vehicle.
Matte versus gloss finish options
Matte finishes are highly effective at minimizing cabin glare, especially when driving under direct sunlight. This satin-like, muted appearance hides fingerprints exceptionally well and maintains a subtle, understated profile. Alternatively, gloss finishes catch the light beautifully, highlighting the deep weave patterns in carbon fiber or the rich grain structure of wood. Your choice here depends entirely on whether you prioritize easy visibility or high-contrast styling.
Material durability and resistance to UV rays
No matter what material aesthetic you select, prolonged exposure to sunlight can take a heavy toll. Premium replacement kits are manufactured with built-in UV inhibitors to prevent yellowing, fading, or cracking over several seasons of hot summer parking. Investing in high-grade materials guarantees that the physical strength and cosmetic finish of the overlay panels do not degrade when exposed to consistent thermal solar energy.
Where to source high-quality replacement parts
Finding the right source for your new components is just as critical as the installation process itself. Reliable suppliers offer a blend of precision molding, sturdy backing, and comprehensive fitment guides.
Evaluating OEM versus aftermarket suppliers
While original equipment manufacturer (OEM) parts guarantee direct compatibility, the aftermarket scene offers extensive creative freedom and custom styled themes. Specialty brands, such as T Sportline, specialize in ultra-premium real carbon fiber styling parts that offer matching weaves and perfect contours. When choosing where to shop, it is important to select an established supplier that stands behind their material specifications.
Checking compatibility for specific Tesla Model years
Tesla periodically updates interior layouts, center consoles, and dash designs without changing the car’s exterior model designation. For example, some model years feature a refreshed sliding console lid while older variants have a dual-door flip-top cover. Always check compatibility charts carefully, as parts designed for one production year will not fit snugly on the interior structure of another.
The importance of reading verified-purchase reviews
Before finalizing any purchase, checking verified feedback from other Tesla owners is an excellent way to gauge actual fitment and installation difficulties. Look closely for mentions of how well the panels slide over factory edges or if the tape backing held up after several months of use. This peer feedback provides an honest look at the real-world durability and ease of installation you can expect.
Essential tools for a professional-grade installation
To achieve a flawless, factory-like fit, you must have the correct equipment on hand before you begin peeling off adhesive covers. Using improvised tools can quickly lead to permanently damaged dashboards or marred door panels.
Recommended prying tools to prevent dashboard scratching
Using metal screwdrivers or butter knives to pry off trim panels is a recipe for deep scratches. Nylon or high-impact plastic pry bars are flexible enough to pop stubborn metal retaining clips free without gouging the surrounding plastic or vinyl surfaces. Proper leverage is key, and these specialty pry kits distribute force over a wider surface area to keep everything pristine.
Adhesive promoters for long-lasting trim security
Many aftermarket overlays rely on double-sided backing tape, which performs best when paired with an adhesive promoter. This chemical primer creates a molecular bond between the factory trim surface and the new adhesive tape, preventing edges from lifting during subsequent summer heatwaves. It should be applied sparingly and allowed to dry completely before the trim is pressed into place.
Cleaning agents for surface preparation
New trim overlays will fail to stick if there are lingering oils, dust, or silicone dressers present on your plastics. Applying one of the best car interior cleaners can thoroughly strip away grease and old vinyl protectants from the surface without drying out the substrate underneath. A clean dashboard is the single most important factor in preventing the new trim pieces from drifting loose over time.
Measuring devices for precise alignment
Using a simple soft tape measure or digital caliper helps verify that your new overlay sits dead center before any sticky backings make contact. Carefully plotting out your alignment points ensures that your replacement parts are perfectly parallel to the surrounding display panels. Because some adhesives bond instantly, taking measurements beforehand eliminates embarrassing alignment mistakes.
Step-by-step guide to removing factory trim pieces
With all your specialized gear organized, you are ready to begin the removal process. Work slowly, applying consistent even pressure, and never rush to yank a stubborn panel out if it feels stuck.
Safely unclipping dash trim sections
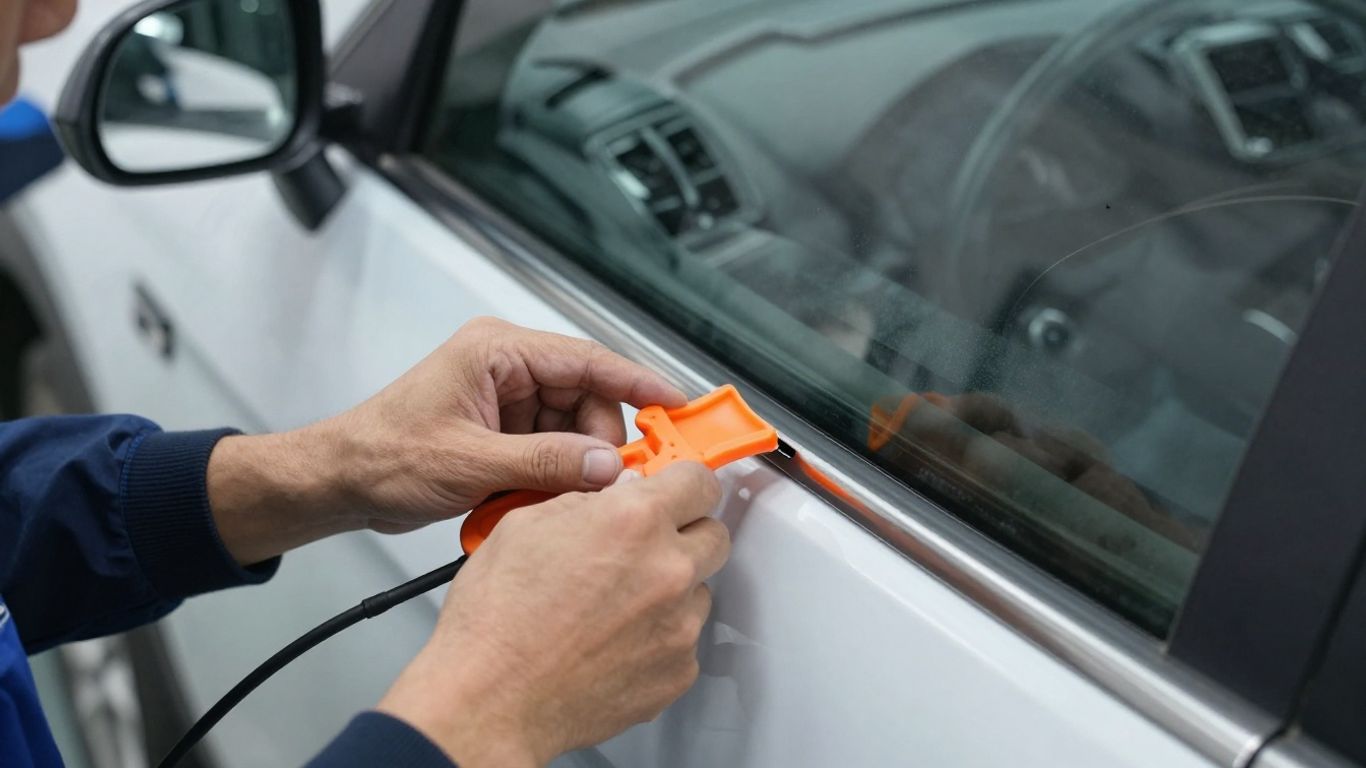
Removing the large horizontal dashboard trim requires starting from the outer passenger edge and moving inward block by block. Wedge your plastic pry tool underneath the lip and apply moderate upward force until you hear the distinct snap of the retaining clips releasing. Repeat this motion across the width of the dash, supporting the released sections as you crawl further left.
Removing center console door inserts without damage
Many center console inserts are held in place by fine sliding tabs that are highly susceptible to snapping if angled incorrectly. Keep the console door in its halfway-open position to relieve internal tension on the guide rails before trying to pry the insert upward. Slide your flat trim tool directly beneath the center point to apply centralized pry pressure, popping the piece cleanly out of its channel.
Managing door panel trim removal for full coverage
Modifying the door trim pieces often requires unclasping the entire upper armrest or window switch panel to reach the mounting tabs. Working from the rear of the door assembly toward the front hinge helps clear the locking hooks without cracking the delicate surrounding plastic. Keep a close eye on any wiring harnesses connected to the door switches so you can disconnect them before pulling the trim fully free.
Tips for ensuring a perfect fit and finish
Getting replacement trim parts to sit completely flat with professional clearances requires attention to detail. Skipping these minor physical steps often results in irregular gaps or lifting edges within just a few weeks of use.
Dealing with temperature extremes during application
Trying to install adhesive-backed parts in a freezing garage or on a blazing-hot dashboard will prevent the glue from bonding correctly. Ideal installation environments range between 65°F and 80°F, which keeps the adhesive material naturally tacky and pliable. If working in a cold climate, gently warming the backing tape with a handheld hair dryer can stimulate maximum adhesion.
Ensuring alignment prior to permanent adhesion
Always perform a dry-fit of every single panel before removing the red protective tape backing to make sure the fit is spot-on. This step allows you to see how the overlay rests against the edges and identify if any micro-adjustments are required. Realizing a piece is crooked after the tape has bonded is incredibly difficult to correct without damaging the new part.
Avoiding common gap issues during installation
Irregular gaps can quickly ruin the appearance of your tesla interior trim replacement parts and look cheap. When installing complex multi-piece setups, it is crucial to understand how they align with existing controls. It is best to review a comparative layout to see how your specific model’s pieces line up:
| Trim Component | Target Gap Margin | Common Alignment Area | Action If Misaligned |
|---|---|---|---|
| Dash Overlay | Under 1.0 mm | Display Screen Edge | Gently slide left or right prior to pressing |
| Center Console | Under 0.5 mm | Cup Holder Bezel | Re-center the panel before final tape contact |
| Door Accents | Under 1.5 mm | Window Swivel Housing | Pull back slightly and adjust the vertical pitch |
Using this structural reference keeps your panel gapping consistent across the cabin, mirroring original assembly standards. This deliberate process ensures that the finished interior looks factory-built rather than hastily modified.
Pressure application techniques for adhesive-backed parts
Once aligned, you must apply firm, even pressure along the entire taped surface for at least thirty seconds. Use a clean microfiber cloth to rub the surface firmly to prevent friction heat from warping the brand-new finish. Focusing on the outermost edges helps lock out moisture and dust, ensuring a permanent bond that will not lift during detailing.
Maintenance and care for your new interior trim
Now that your new trim is installed, keeping it looking great requires a sensible and preventative maintenance routine. Proper care ensures that your selected finish retains its depth and resists scratches over thousands of miles of driving.
Recommended interior cleaning products for new finishes
For general dusting, a soft, slightly damp plush microfiber cloth is usually all you need to keep matte or gloss surfaces clean. When deeper cleaning is needed to remove finger oils, choose specialized interior detail sprays that do not leave a greasy, shiny film behind. Regular light dusting prevents abrasive dirt from accumulating and scratching the surface when wiped down later.
Avoiding harsh chemicals that degrade trim coatings
Never use glass cleaners containing ammonia, or heavy-duty grease removers, on your new interior trim upgrades. These harsh chemicals can quickly strip away the protective clear coat of gloss carbon fiber or dry out real wood grain overlays, causing permanent haze.
Preserving the factory finish of your specialty trim requires avoiding alcohol-based formulas which can permanently haze clear coats.
Following this simple advice ensures the UV protective coating remains intact and glossy for years to come. Remember that gentle cleaning protects your interior investment from unnecessary chemical wear.
Routine inspection for loose edges or shifting
Over many seasons of high heat and freezing temperatures, it is wise to periodically check the corners of your trim overlays for any signs of lifting. Catching a loose edge early allows you to slide a tiny drop of adhesive under the liftoff point before the entire panel moves or snaps out of place. Doing these brief checks during your regular car wash routine ensures that your Tesla cabin remains looking pristine.
For more insight, check out this video outlining a visual step-by-step dash trim installation process:
Conclusion
Upgrading your Tesla’s interior trim is an incredibly satisfying project that instantly elevates the daily driving experience. By choosing high-quality materials, selecting the correct tools, and applying patience during the alignment and adhesion phases, you can achieve a truly refined finish. Maintaining these pieces with gentle, specialized cleaners will ensure your personalized cabin remains beautiful and durable for years to come.
Frequently Asked Questions
Can I reinstall my factory trim if I decide to sell my Tesla?
Yes, most overlay-style replacement trims are designed to be fully reversible without damaging your original factory parts. You can gently heat the adhesive backing using a hair dryer to loosen its grip, peel the overlay off, and clean away any remaining sticky commercial tape residue using a safe adhesive remover.
How long does a full trim replacement project typically take?
If you have prepared your tools beforehand, a full interior trim installation usually takes between one and two hours. Projects that involve completely replacing the complex dashboard panels or dismantling door armrests may take a bit longer, especially if you are working slowly to ensure perfect alignment.
Will installing aftermarket interior trim parts void my Tesla warranty?
No, installing interior trim parts will not void your overall vehicle warranty, as these are cosmetic modifications. However, if you damage any factory wiring harnesses or snap a clip on the original dashboard assembly during your installation, those specific broken parts will not be covered under warranty.
How do I fix a tiny gap that appeared after the adhesive cured?
If a minor gap appears after the adhesive has fully cured, you can gently heat the problem area with a hair dryer to soften the double-sided tape. Once the backing is warm and pliable, press the trim firmly back into place for about a minute to try to correct the spacing.
Can I use household furniture polish on real wood trim inserts?
No, it is highly recommended to avoid standard household aerosol wood polishes, as they contain heavy silicone oils that build up over time. This heavy buildup creates a greasy film that easily attracts dust and fingerprint smudges, making it much harder to keep your cabin looking clean.
What should I do if a trim piece starts lifting in the summer heat?
If extreme cabin temperatures cause an edge of your new overlay to lift, you should clean under the lifting area with a small cotton swab dipped in isopropyl alcohol. Next, apply a tiny drop of fresh adhesive promoter or install a new segment of thin, high-heat mounting tape, pressing firmly to re-establish the bond.
Is carbon fiber trim more durable than wood grain alternatives?
Both materials are extremely durable when finished with high-quality automotive-grade clear coats. However, carbon fiber is naturally less susceptible to minor moisture shifts, whereas real wood grain can occasionally experience microscopic expansion if exposed to high humidity over several years.