

Key Takeaways
A clean Tesla is easier to maintain when each surface gets the right product and method. Build a modest kit first, then add protection or specialist tools as your routine develops.
- Separate paint, glass, wheels, plastics, upholstery, and screens before choosing cleaners.
- Use pH-neutral soap, clean microfiber, and gentle washing techniques to reduce marring.
- Match waxes, sealants, coatings, and decontamination products to the existing finish.
- Keep cameras, panoramic glass, screens, and synthetic upholstery free from residue.
- Follow labels carefully and call a professional when damage goes beyond normal cleaning.
Understand what your Tesla needs before buying supplies
The best tesla detailing supplies are not necessarily the largest collection of bottles. Tesla vehicles combine painted panels with glass, synthetic upholstery, textured plastics, screens, cameras, and often delicate trim, so a product that works well in one area may be unsuitable in another. Start by inspecting the car in daylight and noting its finish, contamination, and existing protection. That small pause prevents unnecessary purchases and careless experimentation.
Identify the surfaces that require different care
Treat the vehicle as a group of surfaces rather than one large object. Painted panels need lubrication and controlled contact, glass needs a residue-free cleaner, wheels may hold metallic brake dust, and screens require a barely damp, soft cloth rather than a sprayed chemical. Interior plastics, vegan leather, carpets, rubber seals, and cameras each deserve their own method. Surface matching matters most because the wrong cleaner can leave gloss, staining, or an oily film where visibility and touch are important.
Consider paint, wrap, ceramic coating, and glass protection
Before buying a strong cleaner or abrasive product, find out whether the car has factory paint, a vinyl wrap, paint protection film, or a ceramic coating. These finishes can change how contamination releases and how a product should be applied. A coated panel usually needs gentle maintenance rather than aggressive polishing, while a wrapped panel should be approached according to the wrap maker’s care instructions. Glass protection also deserves separate consideration, since a product intended for paint may smear or interfere with clear visibility.
Match products to your Tesla model and finish
Model-specific shape can affect the amount of glass, the depth of wheel recesses, and access around trim, but the finish is usually more important than the badge on the hood. Check the owner’s manual, coating paperwork, and product label before purchasing. A useful starting point is a basic wash soap, separate glass cleaner, interior cleaner, wheel-safe brush, drying towel, and several clean microfiber towels. From there, a curated Tesla detailing collection can help you compare categories without treating every bottle as essential.
Decide between DIY detailing and professional services
DIY cleaning suits routine washing, dust removal, interior vacuuming, and light contamination when you have shade, time, and a clean workspace. Professional help becomes more sensible for paint correction, deep stain removal, coating installation, heavily scratched glass, or damage that needs inspection. If you are unsure whether a mark is dirt or a defect, do not keep rubbing it in an attempt to solve the mystery. A cautious assessment is cheaper than turning a small problem into a larger one.
Build a safe exterior washing setup
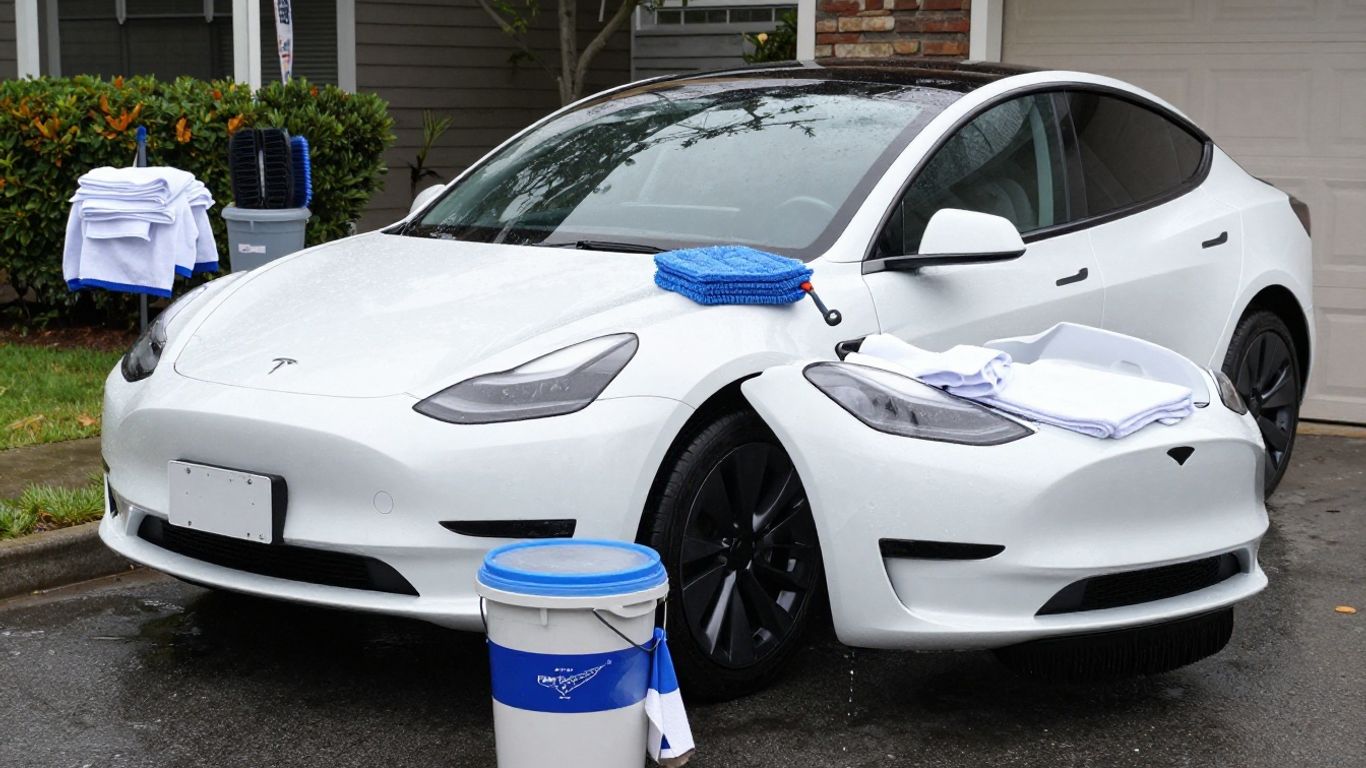
Exterior washing should be slow enough to control dirt and quick enough that soap does not dry on the surface. Work out of direct sun when possible, use separate tools for dirtier areas, and rinse towels as soon as they pick up grit. The familiar two-bucket approach remains a practical way to keep wash water and rinse water apart, especially on lower panels and wheels.
Choose pH-neutral soap and a suitable wash method
A pH-neutral car soap is a sensible default for regular maintenance because it cleans without being needlessly aggressive toward common paint protection. Pre-rinse loose grit, wash from the roof downward, and rinse the mitt frequently. A pressure washer can help with initial rinsing when used at a safe distance and moderate setting, but it does not replace careful contact washing. For lightly dusty cars, a waterless or rinseless method may work only when the product instructions and contamination level make that approach appropriate.
Select microfiber towels, wash mitts, and drying tools
Use a plush wash mitt for painted panels and keep separate mitts or brushes for wheels and tires. Dry with a clean, absorbent towel rather than letting water evaporate in the sun, and use a second towel for door jambs or lower trim. Waffle-weave glass towels can reduce lint and streaking, while short-pile towels are useful for buffing product residue. Launder microfiber separately from cotton and avoid fabric softener, which can reduce absorbency.
Use wheel and tire cleaners without damaging finishes
Identify whether the wheels are painted, powder-coated, polished, or protected before selecting a cleaner. A wheel-safe, non-acid product is generally the more forgiving choice for routine work, but dwell time still matters. Apply it to a cool wheel, agitate with a soft dedicated brush, and rinse thoroughly. Tire dressing belongs on clean, dry rubber and should be applied sparingly so it does not sling onto freshly washed panels.
Avoid products and techniques that cause scratches
Most wash marks come from trapped grit, excessive pressure, poor towel handling, or working in the wrong conditions rather than from one dramatic mistake. Never use the same dirty cloth on paint and wheels, and do not drop a mitt back into the wash bucket without rinsing it. Keep spray nozzles away from damaged seals and loose trim. The practical goal is not speed; it is reducing the number of times abrasive particles travel across the finish.
Choose supplies for paint and body protection
Cleaning removes contamination, while protection changes how the surface handles future washing, water, and exposure. Decide what you want from the product before buying it: easier maintenance, added gloss, longer durability, or a temporary barrier. Protection cannot hide deep scratches or correct neglected paint, and applying it over residue usually preserves the problem rather than solving it.
Compare spray waxes, sealants, and ceramic coatings
Spray waxes are convenient for frequent upkeep, sealants generally offer a longer-lasting synthetic barrier, and ceramic coatings require more careful preparation and application. These categories differ in durability, appearance, maintenance, and curing requirements. A coating is not automatically better for every owner; someone who enjoys regular washing may prefer a simple product that is easy to refresh. Read the label for compatible surfaces and expected preparation instead of choosing by marketing language alone.
Clean and protect painted trim and plastic components
Painted trim can usually follow the same gentle wash process as adjacent panels, but unpainted plastic often needs a product designed to avoid whitening or an overly glossy finish. Test any dressing in a hidden area first, particularly on textured surfaces. Keep product away from pedals, steering-wheel controls, and areas where reduced grip would be unsafe. A restrained, natural appearance is often easier to maintain than a heavy layer that attracts dust.
Handle water spots, road film, and light contamination
Fresh water spots may respond to a careful wash and drying routine, while mineral deposits that remain after washing may require a dedicated spot remover. Road film should be softened and lifted with lubrication rather than scrubbed dry. Work on a cool panel, use small sections, and stop if the mark appears etched into the finish. If contamination is bonded or the paint feels rough after washing, move to a controlled decontamination step rather than increasing pressure.
Select clay bars and decontamination products carefully
Clay products can remove bonded particles, but they also create marring when used without enough lubricant or when repeatedly dragged over dirty paint. Use them only after washing and rinsing, knead or replace the material as directed, and inspect the surface often. A synthetic clay mitt may be quicker for larger areas, while a traditional clay bar offers more control in tight sections. Either way, follow with protection if the product instructions call for it.
Protect Tesla glass, windows, and cameras
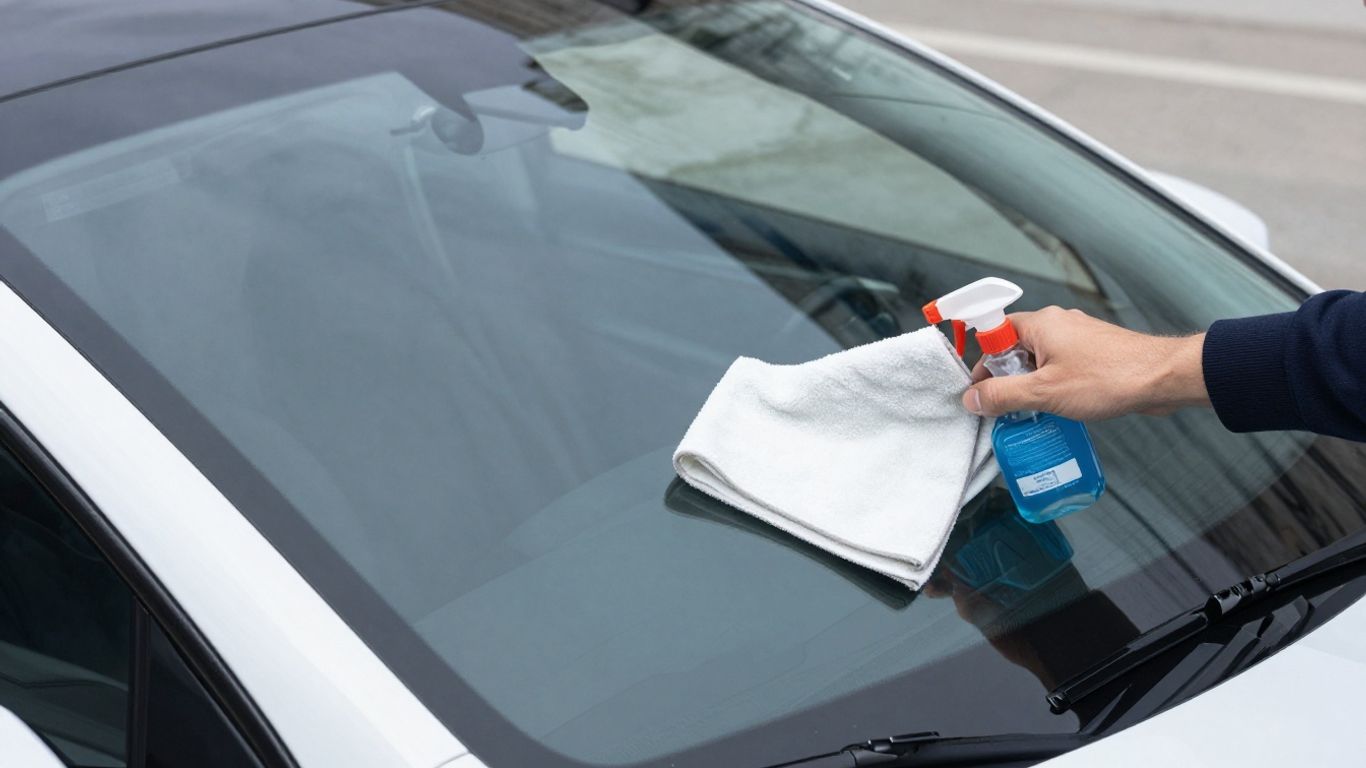
Large glass areas make residue easy to see, and they can make a clean vehicle feel untidy when streaks remain at eye level. Glass should be cleaned in shade with a dedicated towel, while cameras and sensors should be treated as functional equipment rather than ordinary trim. Avoid spraying directly near electronic openings or allowing product to pool around seals.
Clean windows without leaving streaks or residue
Vacuum loose dust from the edges first, then apply a modest amount of glass cleaner to the towel rather than flooding the pane. Use one side to clean and a dry side to finish, changing towels when they become damp or dirty. Wipe interior and exterior glass in different directions so you can identify which side still has a streak. If haze persists, inspect the towel and product before reaching for something stronger.
Choose products for panoramic roofs and windshields
Panoramic roofs and windshields benefit from a cleaner that dries without an oily film and is compatible with any existing treatment. Work in manageable sections and keep the towel folded so a clean face is always available. Avoid abrasive household powders, rough paper products, and cleaners that leave a silicone-like smear. The windshield deserves extra care because a thin residue can become glaring when hit by headlights or low sun.
Keep cameras and sensors free from buildup
Use a clean, soft microfiber cloth for camera lenses and nearby sensor areas, removing dust gently rather than pressing it across the lens. Road salt, insects, wax residue, and dried water can all affect clarity. Do not apply polish, tire dressing, or aggressive glass treatment to camera surfaces unless the vehicle or product instructions specifically allow it. If an alert remains after cleaning, the issue may be mechanical or electronic rather than cosmetic.
Apply glass coatings while preserving visibility
Glass coatings can make water behavior and maintenance different, but preparation is critical. The pane must be clean, dry, and free from old residue before application, and the coating should be leveled and cured exactly as directed. Test visibility from the driver’s seat in varied light before treating the entire windshield. If the finish creates haze, drag, or glare, remove or correct it according to the product instructions instead of adding another layer.
Select interior Tesla detailing supplies
A clean cabin should feel clean, not heavily perfumed or slippery. Interior materials vary from synthetic upholstery to soft-touch plastics, screens, carpets, rubber mats, and glossy trim. Start with dry removal of dust and grit, then use the least aggressive cleaner that can handle the mark. This keeps the cabin’s original texture and sheen intact.
Clean vegan leather seats and synthetic upholstery
Vacuum seams first, then wipe synthetic upholstery with a diluted, material-safe interior cleaner and a soft microfiber cloth. Use light agitation on grime and remove cleaner residue with a separate damp cloth. Avoid soaking seat seams, using harsh solvents, or applying oily leather conditioners designed for animal hide. Always test a hidden area, especially when the seat has perforations, contrast stitching, or a coated surface.
Care for dashboards, screens, and high-touch surfaces
Dust dashboards with a dry, clean microfiber and clean screens with a barely damp cloth approved for delicate displays. Never spray liquid directly onto a screen, instrument area, switch, or vent. Steering wheels, handles, and armrests benefit from more frequent gentle cleaning because hand oils accumulate there. Strong gloss dressings can create reflections and a greasy feel, so a low-sheen finish is usually more comfortable.
Remove stains, dust, and odors from carpets and mats
Remove mats before vacuuming and shake or brush loose grit away from the cabin. Blot liquid stains rather than scrubbing outward, and use a fabric-safe cleaner in small amounts. Odor often comes from an underlying spill, damp material, or trapped debris, so fragrance alone is a temporary cover. Let cleaned carpets and mats dry fully before reinstalling them, particularly around enclosed cabin spaces.
Choose interior protectants with a natural finish
Interior protectants should preserve the material’s feel without leaving a slippery or reflective film. Look for clear instructions about synthetic upholstery, plastic, rubber, and touch surfaces, since one product may not suit every cabin component. Apply sparingly and buff away excess. A natural finish is not merely an aesthetic preference; it can make dust and fingerprints less noticeable while keeping controls easier to use.
Pick the right detailing tools and accessories
Tools affect both the result and the effort required. A small, well-labeled kit is easier to keep clean than a crowded box of rarely used accessories. Choose equipment around your parking situation, water access, power supply, and tolerance for noise. There is no need to buy professional machinery for a weekly maintenance wash.
Compare cordless vacuums, blowers, and pressure washers
A cordless vacuum is convenient for seats, carpets, and tight cabin spaces, while a blower can move water from mirrors, badges, and panel gaps without rubbing. A pressure washer is useful for rinsing when used carefully, but its value depends on safe water access and responsible technique. Consider battery life, storage, attachments, noise, and cleanup as well as headline power. The best tool is the one you can use consistently without creating new risks.
Use brushes for wheels, vents, seams, and tight spaces
Soft detailing brushes reach wheel spokes, vents, charging-port edges, emblems, and trim seams that towels cannot. Keep separate brushes for interior and exterior work, and label them if several look alike. A brush should loosen dirt, not grind it into a surface, so use lubrication and rinse the bristles often. Replace any brush whose handle, metal ferrule, or worn bristles could scratch.
Choose microfiber types by task and surface
Towel density and weave make a practical difference. Plush towels suit drying and buffing, shorter-pile towels handle interior wipe-downs and product removal, and waffle-weave towels are useful on glass. Keep a simple color system so wheel towels never migrate to paint or screens. Wash towels promptly, inspect them for trapped grit, and retire them from delicate work when their edges become rough.
Organize bottles, towels, and tools for efficient detailing
Separate clean towels from used ones and keep chemicals upright in a ventilated storage box. Trigger bottles should be labeled with the product name and dilution, not left anonymous after a long day. A small caddy for interior work and a separate exterior bucket can reduce unnecessary trips around the car. Efficient organization makes it easier to stop, rinse, or change tools before a surface is damaged.
Buy, use, and store Tesla detailing supplies responsibly
A careful buying process is more useful than a long shopping list. Compare the surface, task, dilution, and expected frequency of use before adding another product. Car wash accessories can fill practical gaps, but even a professionally presented kit still needs to be checked against your vehicle’s finish and your own workspace.
Evaluate product ingredients, reviews, and compatibility
Read the label for surface compatibility, dilution, dwell time, ventilation, and warnings. Reviews can reveal issues such as strong fragrance, difficult residue, or poor spray patterns, but they cannot replace a compatibility check. Be especially cautious with products described as acidic, abrasive, solvent-based, or highly concentrated. When instructions are vague, choose a clearer alternative or ask the manufacturer before applying it to an expensive surface.
Calculate the cost of a complete detailing kit
Build the kit around repeatable maintenance rather than buying every specialty product at once. A simple budget might include soap, a wash mitt, two buckets or a suitable rinseless setup, drying towels, glass cleaner, interior cleaner, wheel tools, and a vacuum. Add protection and decontamination products only when the car’s condition calls for them. This staged approach also shows which supplies you actually use, preventing duplicate bottles and unused accessories.
Follow dilution, application, and curing instructions
Concentrates are not automatically more economical if they are mixed incorrectly or allowed to dry on the surface. Measure dilution carefully, follow the recommended dwell time, and work in a ventilated area. Coatings, sealants, and some dressings may need a specific cure period before water or contact. Keep the product label nearby during the job, particularly when using an unfamiliar chemical.
Store chemicals and towels to preserve their performance
Keep chemicals sealed, upright, and away from heat, direct sun, children, and pets. Do not store damp microfiber in a closed container, since odor and mildew can develop quickly. Wash towels according to their care instructions and keep clean stock in a covered, dry place. Discard leaking, crystallized, separated, or strongly altered products rather than trying to revive them with guesswork.
Recognize when a damaged surface needs professional care
Call for professional assessment when paint is deeply scratched, glass is chipped, trim is peeling, upholstery is torn, or a chemical has visibly changed a surface. Stop working if a panel becomes unusually hot, hazy, sticky, or discolored. Cleaning products can remove contamination, but they cannot safely repair every defect. A prompt inspection can preserve more of the original material and clarify whether repair, replacement, or simple maintenance is appropriate.
Conclusion
Good Tesla detailing supplies support a calm, repeatable routine: identify the surface, clean with the least aggressive suitable method, protect only when preparation is complete, and store every tool properly. Start small, observe how the vehicle responds, and spend more only when a real maintenance need appears.
Frequently Asked Questions
What supplies are essential for basic Tesla detailing?
A useful starter kit includes pH-neutral car soap, separate wash and wheel tools, quality microfiber towels, glass cleaner, interior cleaner, a drying towel, and a vacuum. Add protection products after you understand the vehicle’s existing finish.
Can household glass cleaner be used on a car?
Some household formulas may contain ingredients that leave residue or affect nearby materials. A dedicated automotive glass cleaner with clear instructions is the safer choice, especially for large windows and windshields.
How often should a Tesla be washed?
Wash frequency depends on weather, parking, road conditions, and how quickly contamination accumulates. Light maintenance between full washes can help, but never use a low-contact method on heavily soiled paint without sufficient lubrication.
Are ceramic coatings necessary?
No. Ceramic coatings can simplify maintenance when correctly prepared and applied, but a wax or sealant may be more suitable for owners who want a simpler or more frequently refreshed form of protection.
What is the safest way to clean a car screen?
Turn the screen off, remove loose dust with a clean soft cloth, and use only a barely damp cloth when needed. Do not spray liquid directly onto the display or press hard while wiping.
How can water spots be removed safely?
Start with a normal wash and dry the panel carefully. If spots remain, use a compatible water-spot remover on a cool surface, follow its directions, and stop if the marks appear etched rather than sitting on top.
When should detailing be handled by a professional?
Professional help is appropriate for deep scratches, chipped or damaged glass, paint correction, severe stains, failed coatings, chemical damage, or any problem that becomes worse during gentle cleaning.