

Key Takeaways
A Tesla Model 3 tow hitch is only useful when the vehicle, receiver, wiring, and load are matched correctly. Confirm the exact configuration and local rules before buying parts or attaching a trailer.
- Check compatibility by model year, drivetrain, market, VIN, and owner’s manual.
- Treat the official tow package and aftermarket receivers as different installation paths.
- Keep trailer weight, tongue weight, payload, and brake requirements within their limits.
- Test wiring, lighting, clearance, sensors, receiver security, and safety chains before driving.
- Remove and store a detachable receiver when it is not being used.
Tesla Model 3 tow hitch compatibility by year and configuration
Compatibility is not determined by the badge alone. Model year, production date, drivetrain, market, and the equipment fitted to the individual vehicle can all affect which hitch arrangement is appropriate. A careful check at the start is cheaper than correcting a poor fit after the bumper has been removed.
Factory tow package availability across markets
Factory equipment has varied between markets and model years, so online discussions can easily mix different vehicles. Available source material describes a North American factory package for 2024-and-newer redesigned Model 3 Rear-Wheel Drive and All-Wheel Drive variants, while European availability has followed a different timeline. Confirm the position for the vehicle’s market rather than assuming an overseas package applies locally.
The Tesla tow package information describes a package with a tow bar, 2-inch receiver, 7-pin connector, trailer harness, and Tow Mode software, with a stated towing limit of up to 2,200 pounds. Those details are useful only when they match the vehicle and market being considered.
Differences between Standard Range, Long Range, and Performance models
Standard Range, Long Range, and Performance names do not by themselves establish hitch approval. Even when two cars share a body style, their production dates, drivetrain, suspension, software, or regional equipment may differ. Use the vehicle documentation and an exact fitment check instead of treating a trim name as permission to tow.
Aftermarket listings can also use broad fitment language. For example, a listing may identify several older Model 3 years, but that does not replace confirmation of the car’s own limits, wiring needs, and local requirements.
How to verify compatibility by VIN and owner’s manual
Start with the VIN and the vehicle’s build information, then compare the result with the owner’s manual and the hitch manufacturer’s fitment instructions. Ask for written confirmation when a seller cannot clearly identify the year, drivetrain, market, and receiver design covered by its listing. Verify before purchase rather than relying on photographs or a familiar-looking bumper.
The manual should also clarify whether the vehicle is approved for towing, what equipment is required, and which weights apply. If those details remain unclear, pause the installation and seek confirmation from a qualified service or parts professional.
Important changes across Model 3 model years
Model 3 equipment has changed over time, and the rear bumper, mounting points, wiring provisions, and software support may not be identical between generations. The Tesla Service guide also notes that procedure illustrations can differ for vehicles manufactured around January 2024, so written instructions and the vehicle itself should be checked together.
Do not infer that a hitch designed for one production period transfers directly to another. A correct-looking receiver can still have the wrong brackets, clearance, electrical arrangement, or rating.
Choosing between an official and aftermarket tow hitch
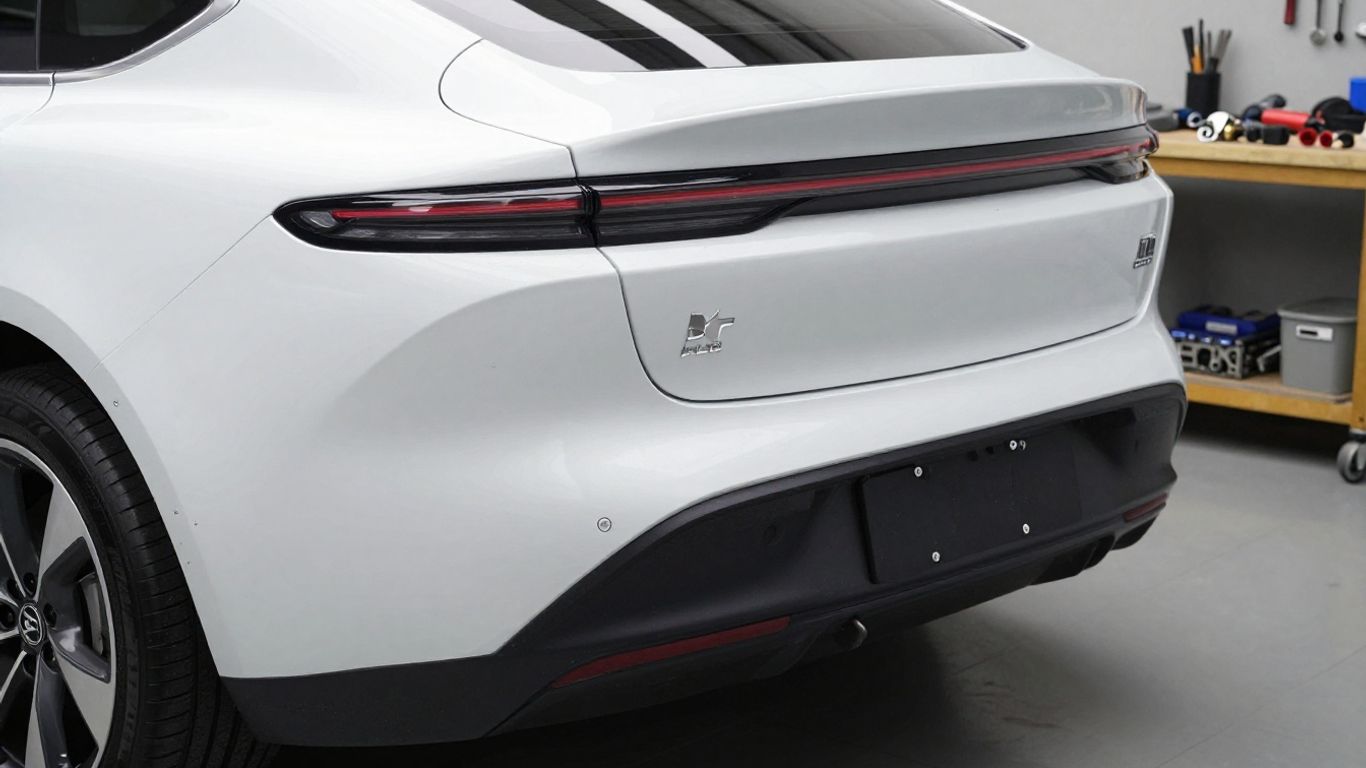
The choice between an official package and an aftermarket receiver is more than a price comparison. It involves fitment evidence, wiring, software behavior, installation support, corrosion protection, and the type of load you plan to carry. Decide first whether the hitch is for bikes and cargo or for a braked trailer, because the equipment requirements can be different.
Benefits and limitations of the Tesla tow package
An official package may offer a more unified path when it is approved for the exact vehicle. The documented North American package includes the receiver, connector, harness, and Tow Mode software, but its stated compatibility is limited to the specified newer Rear-Wheel Drive and All-Wheel Drive vehicles. It is not a universal answer for every Model 3.
Factory availability can also vary by country and date. Check current ordering and service information before treating an advertised package as available for a particular car.
What to look for in an aftermarket receiver
An aftermarket receiver should come with clear vehicle-specific fitment, installation instructions, hardware, and a published rating. Examine how it attaches to the structure, where the receiver sits behind the bumper, and whether the design preserves access to sensors, the trunk, and any removable trim.
For an older vehicle, the CURT 13449 hitch listing is one example of a vehicle-specific 2-inch receiver described for 2017–2019 Model 3 models. Its published figures and fitment still need to be compared with the individual vehicle and intended use; a listing is not a substitute for the car’s approved limits.
Comparing hitch classes, receiver sizes, and materials
Receiver class, opening size, material, finish, and mounting design should all match the load. A larger receiver is not automatically safer, and a high receiver rating does not increase the vehicle’s own towing or payload limit. The lowest applicable rating governs the setup.
Think of the hitch as one link in a chain that includes the vehicle, ball mount, coupler, safety chains, wiring, trailer, and cargo. Every link must be suitable, and the weakest one sets the practical boundary.
When professional installation is the safer choice
Professional installation makes sense when the bumper must be removed, wiring modules require testing, or the instructions call for unfamiliar fasteners and torque procedures. It is especially sensible when the vehicle has parking sensors, cameras, underbody panels, or an unfamiliar electrical architecture.
A qualified installer should explain what was fitted, where the wiring is protected, and how the receiver is secured. Keep the instructions and installation record with the vehicle for future inspections.
Understanding towing capacity and payload limits
Towing capacity is not a single number that can be applied to every Model 3. It depends on the approved configuration, equipment, trailer, and local rules. Payload is just as important because passengers, luggage, accessories, and hitch load all occupy the vehicle’s available carrying capacity.
How to find the correct towing rating
Use the vehicle’s owner’s manual, official documentation for the exact configuration, and the receiver’s rating together. If the sources disagree, follow the more restrictive instruction and ask for clarification before towing. Never use an aftermarket receiver’s maximum figure as proof that the vehicle can tow that amount.
The documented North American package source states a limit of up to 2,200 pounds for the specified newer vehicles. That figure should not be carried over to a different year, market, or configuration without confirmation.
Trailer weight, tongue weight, and vehicle payload explained
Trailer weight is the loaded trailer, not merely its empty advertised weight. Tongue weight is the downward force placed on the hitch, while payload includes people, luggage, accessories, and that tongue load inside the vehicle’s overall carrying allowance.
A simple check is to consider all of the following before loading:
- The trailer’s actual loaded weight.
- The expected tongue weight at the coupling point.
- Passengers, luggage, and hitch-mounted accessories.
- The receiver, ball mount, coupler, and safety-chain ratings.
This calculation prevents a light trailer from becoming an overloaded vehicle once bikes, camping gear, or passengers are added.
How towing affects range and charging frequency
A trailer adds mass and aerodynamic drag, so energy use will usually rise and charging stops may become more frequent. The effect varies with speed, wind, temperature, terrain, trailer shape, and load distribution. Plan with a margin rather than assuming the normal unladen route remains practical.
Before departure, identify compatible charging locations and allow extra time. A bike rack or cargo carrier can also affect efficiency, although usually differently from a full trailer.
Why local regulations and trailer brakes matter
Rules for trailer brakes, lighting, safety chains, registration, maximum dimensions, and speed differ by jurisdiction. A trailer that is legal in one state or country may need additional equipment elsewhere. Check the rules that apply where the vehicle and trailer will actually travel.
Weight ratings and legal requirements are separate questions. Meeting a hitch rating does not automatically satisfy a brake or lighting rule, so both should be checked before the first trip.
Installing a Tesla Model 3 tow hitch
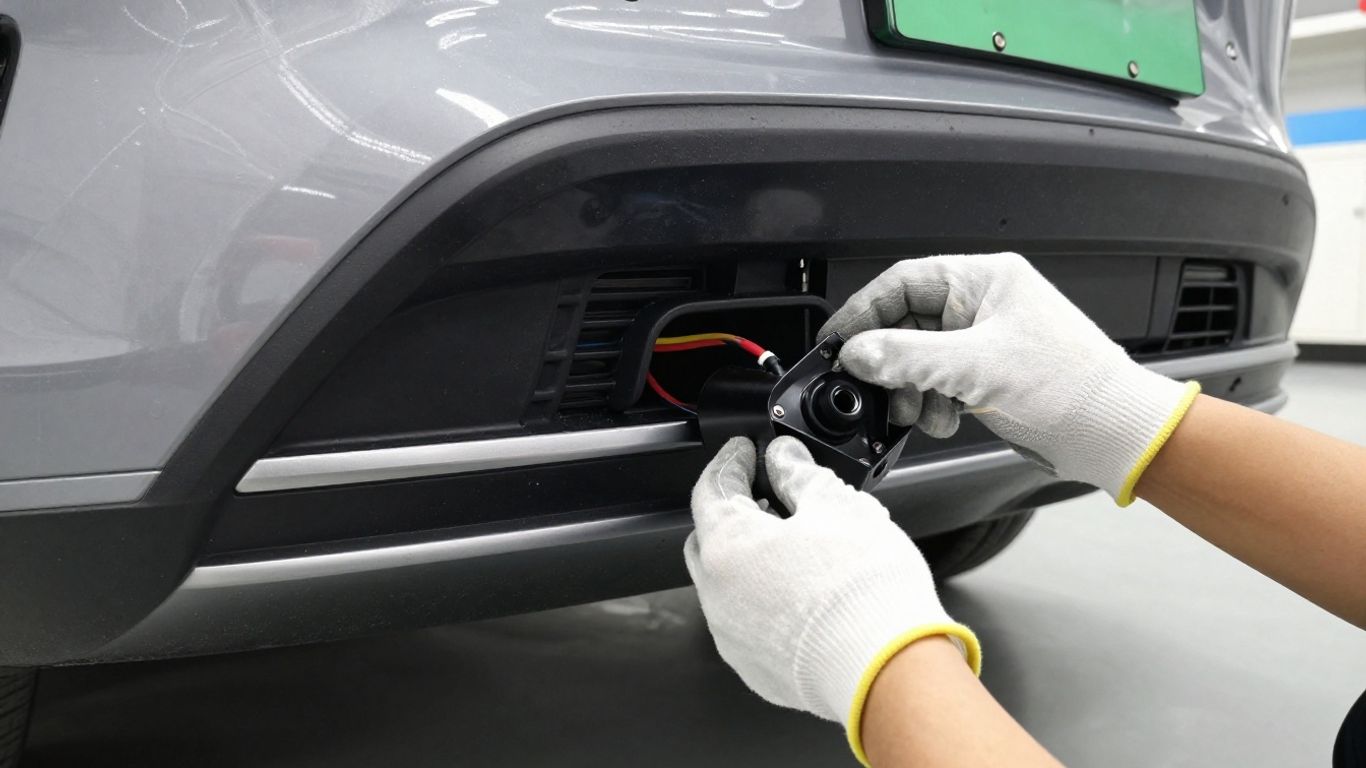
Installation can involve the rear bumper, underbody panels, structural mounting points, electrical connections, and sensor clearance. The right procedure depends on the receiver and vehicle, so generic instructions should not replace the supplied guide. Work methodically and protect painted parts while components are removed.
Tools and preparation for the installation
Read the complete instructions before lifting the vehicle or removing trim. Prepare suitable supports, trim tools, torque tools, protective blankets, fasteners, and a clean place to store the bumper and receiver. Confirm the kit contains the brackets, hardware, wiring components, dust covers, and any required locking parts.
Record the original routing of clips and harnesses with photographs. That small step helps prevent pinched wiring and missing fasteners during reassembly.
Removing and reinstalling the rear bumper components
Rear bumper removal should be done slowly, with attention to clips, wheel-arch fasteners, underbody panels, and sensor wiring. Support the bumper rather than allowing it to hang from a connector or painted edge. Keep removed hardware grouped by location because similar-looking fasteners may not be interchangeable.
During reinstallation, check that the bumper sits evenly and that every clip is fully seated. Do not force a panel into place to hide a bracket or harness that has been routed incorrectly.
Connecting trailer wiring and electrical modules
Follow the hitch kit’s wiring diagram and protect every connection from water, abrasion, heat, and movement. A trailer connector should be firmly mounted and positioned where it cannot drag on the road or be crushed by the hitch hardware. If an electrical module is specified, install it as directed rather than improvising a splice.
Test the lighting functions with a suitable tester or connected trailer. Verify indicators, tail lamps, brake lamps, and any required rear fog or auxiliary functions for the local market.
Protecting sensors, cameras, and underbody components
Before tightening everything, inspect the clearance around parking sensors, cameras, bumper covers, wiring, and underbody shields. A receiver or harness that sits too close can create rubbing, false alerts, or damage over time. Make sure the removable receiver and dust cover can be operated without striking nearby parts.
The tow hitch connection guide describes using the correct hitch, attaching safety chains, and storing the removable hitch in a dry location. Those simple habits help preserve both the coupling hardware and the surrounding vehicle.
Post-installation checks and testing
Once the installation is complete, check fastener torque against the instructions, confirm the receiver locks correctly, and inspect the bumper gaps. Test the wiring before attaching a load, then perform a short low-speed check in a safe area. Listen for movement and recheck the hardware afterward.
A second inspection after the first loaded trip is worthwhile. If the receiver shifts, the lights fail, a sensor behaves unexpectedly, or the bumper moves, stop using the setup until it has been examined.
Using a tow hitch for bikes, cargo, and trailers
A hitch-mounted accessory can be simpler than towing a trailer, but it still adds weight behind the rear axle and changes clearance. The receiver, accessory, and load must remain within their respective limits. Secure the load so it cannot swing into the car, obscure required lights, or detach in a sudden stop.
Choosing a hitch-mounted bike rack
Choose a rack that matches the receiver size and supports the number and weight of bikes being carried. Check its maximum vertical load, anti-wobble mechanism, locking points, and ability to fold or tilt without touching the bumper. Heavy electric bikes may exceed a rack’s limit even when ordinary bicycles do not.
Test trunk access and rear visibility with the bikes fitted. If lamps or the license plate are obscured, use the required auxiliary lighting or plate arrangement for the jurisdiction.
Using a cargo carrier without exceeding limits
A cargo carrier creates a rear overhang and can place substantial leverage on the receiver. Weigh the carrier and its contents, keep dense items low and close to the vehicle, and stay below the relevant vertical-load rating. Waterproofing and tie-downs matter too, especially when the carrier is exposed to road spray.
Do not treat unused trailer capacity as permission to add more cargo. The carrier itself consumes part of the available load allowance.
Towing a small trailer safely
A small trailer still needs a suitable coupler, ball mount, safety chains, lighting, and—where required—brakes. Attach the chains beneath the trailer tongue so they can help support it if the coupling separates. Check that the trailer is level enough for stable handling and that its load cannot shift.
The trailer hitch installation option notes that a hitch kit intended for bike racks and cargo carriers may need a separate wiring kit for trailer use. That distinction is a useful reminder to verify the electrical equipment rather than assuming every receiver is trailer-ready.
Managing rear clearance, visibility, and load distribution
Measure the rear overhang and watch steep driveways, ramps, kerbs, and tight turns. A long accessory or trailer can contact the ground well before the vehicle’s tires do. Use mirrors and a spotter when reversing, and allow room for the trailer to track differently from the car.
Load distribution should keep the trailer stable without placing excessive downward force on the hitch. Recheck straps, coupler security, and clearance after the first few miles.
Driving and maintaining a Model 3 with a tow hitch
A hitch changes the vehicle’s length, mass, and response, even when it carries only a rack. Smooth inputs are preferable to abrupt acceleration, braking, and steering. Give yourself time to learn the changed clearances in a quiet area before entering dense traffic.
Pre-trip inspection and connection checklist
Walk around the entire setup before every departure. Look underneath as well as at the connector and visible hardware, because a loose pin or damaged cable may not be obvious from the driver’s seat.
A practical check includes:
- Receiver locking pin, ball mount, and coupler security.
- Safety chains crossed beneath the trailer tongue.
- Trailer or accessory lights, reflectors, and plate visibility.
- Tire condition, load straps, doors, and clearance from the bumper.
Repeat the inspection after a short distance, when vibration may have settled the equipment.
Adjusting speed, braking, and following distance
Carry speed conservatively and leave a larger gap to the vehicle ahead. A trailer or loaded rack can increase stopping distance and make lane changes less immediate. Brake progressively, avoid sharp steering, and take extra care on descents, in crosswinds, and on wet roads.
Follow any lower speed limits that apply to trailers or loaded combinations. The safest pace is the one that keeps the setup stable and leaves room for correction.
Checking range, tire pressure, and hitch hardware
Check tire pressures against the correct loaded-use guidance and inspect the trailer tires separately. Range planning should account for weather, hills, speed, and the accessory or trailer’s shape. Recheck the hitch for corrosion, cracks, looseness, or unusual movement at regular intervals.
A quiet receiver is not proof of a sound installation. Visual inspection and the prescribed torque checks remain useful, particularly after rough roads or a long trip.
Removing the receiver when it is not in use
A detachable receiver should be removed when it is not needed if the instructions call for removal. Clean and dry it, protect the hitch housing with its dust cover, and store the receiver in a dry place. Keep the key and locking components together so the next installation is complete.
Removing the receiver can also improve rear clearance and reduce exposure to road grime. Never leave a partly locked receiver in place.
Warning signs that require inspection or service
Stop and investigate if the receiver moves, the bumper gaps change, wiring becomes intermittent, or warning messages appear after installation. Cracked welds, bent hardware, tire contact, unusual trailer sway, and repeated sensor alerts also require attention.
Do not solve a structural or electrical problem by simply tightening a random fastener. Use the installation instructions and have the vehicle inspected when the cause is uncertain.
Common Tesla Model 3 tow hitch mistakes to avoid
Most hitch problems begin before the car moves. An incorrect fitment, incomplete wiring job, or overloaded accessory can compromise handling and create expensive damage. A short compatibility and safety review is worth doing even when the installation appears straightforward.
Installing a hitch on an incompatible configuration
Do not rely on the Model 3 name, a shared body shape, or a seller’s generic year range. Confirm the VIN, drivetrain, market, production period, mounting design, and documentation. If the receiver is not clearly approved for the vehicle, do not install it until fitment is established.
Exceeding tow or tongue-weight limits
Never use the receiver’s headline capacity as the vehicle’s capacity. Consider loaded trailer weight, tongue weight, passengers, luggage, the receiver, and every accessory together. A setup can be under the trailer rating but still exceed the vehicle’s payload or vertical-load limit.
Skipping wiring, lighting, or brake checks
A receiver that physically fits is not necessarily ready for trailer use. Test every required lamp, confirm the connector is protected, and check trailer brakes where they are required. Replace damaged cables rather than taping over exposed conductors.
Blocking sensors or interfering with the trunk
Check sensor fields, camera views, bumper clearance, trunk movement, and license-plate visibility with the accessory loaded. A rack that folds may still strike the car while tilting, and a cargo bag can cover lamps or cameras. Recheck after loading because suspension movement changes clearances.
Assuming every hitch accessory is Tesla-compatible
A ball mount, bike rack, cargo carrier, or wiring kit must match the receiver and its rating. Reviews and photographs can help identify practical concerns, but they do not prove safety or fitment. The owner discussion of budget hitch options illustrates why weld quality, fit, and installation details deserve close scrutiny rather than a decision based on price alone.
Conclusion
A safe Tesla Model 3 tow hitch setup begins with exact compatibility research and ends with careful loading, testing, and maintenance. Match the receiver and wiring to the vehicle, respect every weight and legal limit, and inspect the whole connection before each journey. When any part of the setup is uncertain, postponing the trip is the sensible choice.
Frequently Asked Questions
Can every Model 3 use a tow hitch?
No. Compatibility varies by model year, market, drivetrain, production details, and the specific hitch. Confirm the vehicle’s documentation and exact fitment before buying or installing one.
Is a hitch-mounted bike rack the same as towing a trailer?
No. A bike rack usually places a vertical load on the receiver, while a trailer adds coupling forces, rolling weight, aerodynamic drag, and often additional wiring or brake requirements.
Does a receiver’s rating determine how much the car can tow?
No. The vehicle, receiver, ball mount, coupler, and trailer each have limits. The most restrictive applicable limit controls the safe setup.
Do I need trailer wiring for a cargo carrier?
Not always, but a carrier can block the vehicle’s lamps or license plate. If that happens, auxiliary lighting or another legally compliant arrangement may be required.
Should safety chains be used with a small trailer?
Yes, when towing a trailer, use properly attached safety chains as required by the equipment instructions and local rules. Cross them beneath the trailer tongue so they can help support it if the coupling separates.
Can towing reduce driving range?
Yes. Added weight and aerodynamic drag generally increase energy use, while speed, wind, terrain, temperature, and loading affect the size of the change. Plan charging with extra margin.
When should a tow hitch be inspected?
Inspect it before every trip and again after the first short distance with a new load. Arrange a closer inspection if you notice movement, corrosion, cracked hardware, wiring faults, sensor warnings, or unusual trailer behavior.