

Key Takeaways
A well-planned tesla interior lighting upgrade can improve atmosphere without making the cabin distracting or difficult to service.
- Match the kit to your Tesla model, year, trim, and interior layout.
- Decide whether you want subtle ambient light or brighter utility lighting.
- Confirm power sources, wire routes, and airbag locations before buying.
- Test brightness and controls at night, not only in a bright garage.
- Budget for installation time, replacement parts, and future troubleshooting.
Choose the right Tesla interior lighting upgrade
A cabin-lighting project should begin with the feeling you want inside the car. Some drivers want a soft line along the dashboard, while others need clearer footwell or door illumination. The best upgrade is usually the one that fits the existing interior instead of competing with it.
Factory lighting limitations by Tesla model
Tesla interiors vary by generation, trim, and production year, so factory lighting can feel quite different from one vehicle to another. A basic setup may provide enough light to find a handle or buckle, but not enough warmth or coverage for a more lounge-like cabin. Before shopping, inspect the current lights with the doors closed and the cabin dark.
Also check whether your vehicle already has illuminated areas that a kit may duplicate. Photographing the dashboard, doors, console, and footwells helps you compare products later. It is a simple step, but it prevents buying a package designed around a different interior revision.
Ambient lighting versus replacement bulbs
Ambient lighting adds a low, indirect glow through strips, channels, or concealed modules. Replacement bulbs are more direct: they improve or change an existing lamp rather than creating a new lighting zone. These approaches can work together, but they solve different problems.
If you mainly want atmosphere, begin with a restrained strip or footwell kit. If the cabin feels hard to see when loading bags or finding controls, practical LED replacements may be more useful. A Tesla lighting collection can help you compare those broad categories before narrowing the choice.
Light strips, door lights, footwell lights, and roof lighting
Light strips are useful along dashboards and door panels because they create an even visual line when hidden correctly. Footwell lights add a small pool of light near the floor, while door lights can make entry and exit feel more finished. Roof or dome-light changes are more visible and should be selected carefully so they do not produce harsh glare.
Think in zones rather than counting LEDs. A single dashboard strip may be enough for a minimalist cabin, while a family vehicle may benefit more from footwell and door illumination. The goal is balanced coverage, not maximum brightness.
Matching the upgrade to your interior style
Dark upholstery can absorb a surprising amount of light, whereas pale trim reflects it around the cabin. Warm white tends to feel calm and discreet; cool white looks cleaner but can feel clinical when driven at night. RGB kits provide flexibility, although many owners eventually use one quiet color most of the time.
Treat the cabin like any other room where lighting affects color and mood. A useful lighting and paint guide explains why artificial light can change how surfaces appear, a consideration that applies to trim, upholstery, and decorative inserts as well.
Compare lighting options for Model 3, Model Y, Model S, and Model X
Model names alone are not enough to establish fit. Door shapes, center consoles, dashboards, connectors, and trim clips can change across refreshes and production years. Compare the kit’s stated application with your vehicle identification details before assuming that a visually similar cabin uses the same parts.
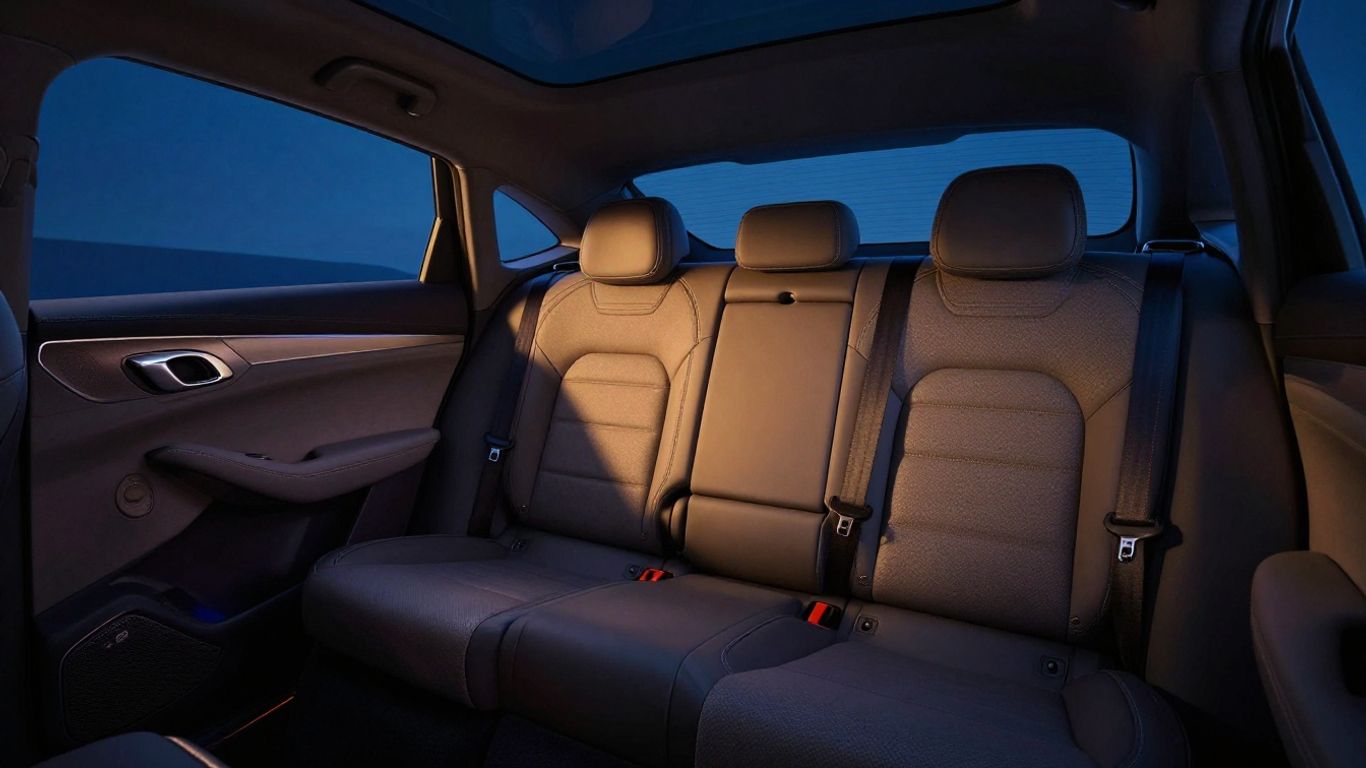
The following sections focus on practical selection rather than a single universal recommendation. For another source organized around Model 3 lighting upgrades, check the listed production range and product notes closely rather than relying only on the page title.
Best upgrades for Tesla Model 3
For Model 3, dashboard strips and footwell lights are common starting points because they add atmosphere without changing the whole cabin. Door-pocket or door-panel lighting can be attractive too, but it requires more careful trim work and wire management. Earlier and refreshed versions should be treated as separate fitment questions.
A compact kit is often easier to hide in the Model 3’s clean interior. If you prefer practical visibility, prioritize low-glare footwell lighting over a highly visible strip. Product listings for a Model 3 interior collection may be useful for comparing those two directions.
Best upgrades for Tesla Model Y
The Model Y’s taller cabin and utility-focused layout can make footwell and door illumination especially helpful. A dashboard treatment can still work, but the light should remain indirect so it does not reflect strongly in the windshield. Consider how passengers will experience the light from the second row as well.
Check the rear-door route and available trim space before ordering a full-cabin kit. A partial installation may look more coherent than forcing a front-focused product into every area. The right balance is usually soft front lighting with enough rear coverage to avoid a visibly unfinished cabin.
Lighting considerations for Model S and Model X
Model S and Model X interiors have changed substantially across generations, and their larger cabins can require longer runs or different mounting points. Door architecture, rear seating, and roof features also affect how a lighting kit should be installed. Measure each zone rather than assuming a Model 3 or Model Y package will translate.
For these vehicles, a smaller number of carefully positioned lights may look more intentional than a dense network of strips. Pay particular attention to second-row passengers, door movement, and areas where panels meet moving hardware. Compatibility should come before color modes or app features.
Checking compatibility with your model year
A listing that names a vehicle model may still exclude a refresh, a right-hand-drive layout, or a particular interior trim. Look for explicit year ranges, connector photographs, installation diagrams, and notes about dashboard or door revisions. If any of those details are missing, ask the seller before opening the package.
Use a simple comparison table while researching. It keeps the purchase decision tied to fitment instead of letting an attractive product photograph do all the persuading.
| Check | Why it matters | What to confirm |
|---|---|---|
| Model and year | Shapes and connectors can change | Exact stated application |
| Interior revision | Trim channels may differ | Dashboard and door photos |
| Power connection | Determines installation method | Connector type and location |
| Coverage | Prevents incomplete-looking results | Included zones and cable lengths |
After this check, eliminate anything that requires guesswork about connectors or panel fit. A modest compatible kit is a safer choice than a feature-heavy kit with uncertain installation details.
Plan the installation before buying
Planning is where most avoidable problems are prevented. Decide where each light will sit, how each wire will travel, and where power will be taken before ordering. A few minutes with a tape measure and flashlight can save hours of rework.
Identifying power sources and connection points
Start by locating the proposed power source and determining whether it remains active when the vehicle is locked or asleep. Some kits are designed around existing cabin-light connectors, while others use a separate controller or accessory connection. Do not assume that a convenient-looking wire is suitable simply because it is nearby.
Read the installation instructions before purchasing and note every connection point. If the documentation does not clearly identify the required source, treat that uncertainty as a compatibility concern rather than improvising.
Choosing plug-and-play versus hardwired kits
Plug-and-play kits generally appeal to owners who want a reversible installation and fewer electrical modifications. Hardwired systems can offer a tidier result, but they demand more confidence with routing, insulation, and connection security. Neither label guarantees quality, so inspect the actual connectors and instructions.
For a first project, reversibility has real value. It lets you remove or reposition the lighting if the color, brightness, or route does not work as expected. More involved installations make sense when the cabin design and electrical plan are already settled.
Measuring trim, doors, and footwells
Measure the visible length of each intended run, then allow extra length for corners and hidden routing. Check the depth of trim gaps as well as their length; a strip that fits across a panel may not fit inside its edge. Footwells also need enough slack for seat movement and cleaning.
Record the measurements by zone instead of relying on memory. Include front and rear doors separately, and note any clips or seams that might interrupt a continuous line. This turns shopping into a straightforward comparison of cable length and coverage.
Protecting airbags, wiring, and interior panels
Airbag areas and their deployment paths should never become improvised wire channels. Keep cables away from moving hinges, sharp metal, seat tracks, and hot surfaces. Use trim tools rather than metal screwdrivers when lifting interior pieces, and avoid pulling panels harder than necessary.
A safe plan also includes a stopping point. If a panel resists or the instructions conflict with the vehicle’s layout, pause and reassess rather than forcing it. Neatness matters, but preserving clips, seals, and restraint-system clearance matters more.
A practical installation checklist is short enough to keep beside the car:
- Photograph panels and existing connections before removal.
- Label each cable by its intended lighting zone.
- Test every module before hiding the wiring.
- Keep slack clear of hinges, seats, and trim clips.
Once those checks are complete, the installation becomes a controlled sequence instead of a search for missing connections. That preparation is usually more valuable than buying a kit with extra modes.
Install a Tesla interior lighting upgrade safely
Installation quality affects both appearance and reliability. A light can be bright and colorful yet still look unfinished if its cable is visible at every corner. Work slowly, keep removed hardware organized, and test each section while access is still easy.
Preparing the vehicle and required tools
Park on a level surface, switch off the vehicle, and give the electrical system time to settle according to the kit’s instructions. Gather plastic trim tools, a flashlight, measuring tape, cleaning cloths, cable ties, and any supplied adhesive or clips. A small container for screws and fasteners prevents avoidable losses.
Clean the mounting surfaces before applying adhesive. Dust and interior oils can make a strip lift later, especially around doors and lower panels. Test the lights on the bench or with temporary connections before committing them to the trim.
Routing wires without visible gaps
The cleanest routes follow existing seams and concealed channels. Feed wire gradually, checking from the driver’s and passenger’s viewpoints so a hidden section does not suddenly become visible from another seat. Leave enough slack at moving panels without creating loops that can catch.
Do not pinch cables beneath clips or press them against sharp panel edges. If a route needs force to close, it is probably too crowded. A tidy installation should allow the trim to return to its original position without bulges or rattles.
Installing footwell and door lighting
Footwell modules should illuminate the floor rather than shine directly into the occupants’ eyes. Mount them where shoes and cleaning tools are unlikely to strike them, and leave safe clearance around pedals and seat movement. Door lights need extra care because the panel opens, closes, and flexes repeatedly.
Install one zone at a time and check the result before moving on. This makes it easier to identify a poor angle or excessive cable length while the relevant panel is still accessible. It also prevents a small routing mistake from spreading through the entire cabin.
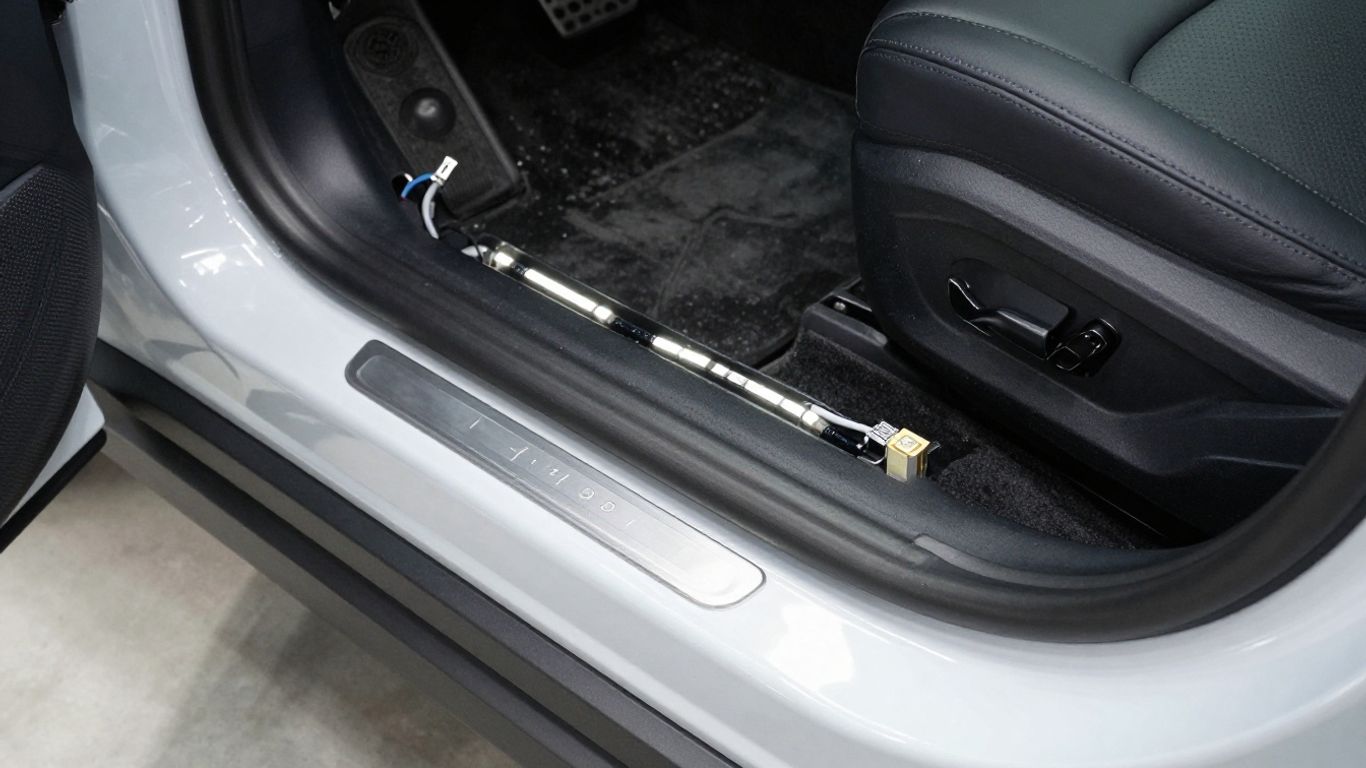
Testing brightness, controls, and power draw
Test every color, dimming level, transition mode, and control method before replacing all trim. Watch for delayed startup, uneven brightness, or a section that responds differently from the others. Then lock the vehicle and observe whether the system behaves as the instructions describe.
A test in daylight is not enough. Repeat it at night from the driver’s seat, checking reflections in the windshield and mirrors. If the installation includes a controller, confirm that it remains secure and that its cables are not under tension.
Use the video as a visual reference for general trim-handling technique, but follow the instructions supplied with your specific kit and vehicle. Small model-year differences can change the safest route.
Select the right features and lighting settings
Features are useful only when they improve the experience without adding distraction. A system with fewer controls can be more enjoyable if it is easy to set and leaves the driver’s view clear. Choose the visual effect first, then select the control method that supports it.
Color temperature and RGB options
Warm white gives trim a softer, more residential feel, while neutral or cool white can make entry areas easier to see. RGB adds color selection and can suit a cabin used for different moods, but it also creates more opportunities for uneven settings between zones.
If you want a restrained result, choose a single color and use RGB flexibility as an occasional option. Look at the light against your actual upholstery, since the same color can appear noticeably different on black, gray, or pale surfaces.
Brightness, dimming, and color-changing modes
Dimming is more valuable than maximum output for most interior applications. It lets you use brighter settings when loading the car and lower settings while driving. Color-changing effects should transition smoothly and remain slow enough that they do not become a moving distraction.
Set the system from the driver’s seat after dark. If a strip reflects in the glass or draws attention away from the road, lower it or redirect the light source. Low-glare settings matter more than a long list of animated modes.
App, remote, and vehicle-controlled features
App and remote controls can make adjustment convenient, but they add another device, pairing step, or controller to maintain. Vehicle-controlled behavior may feel more integrated when available, although compatibility depends on the kit and model. Read exactly what the control system supports instead of assuming every mode works through the car’s own interface.
Keep the everyday setup simple. A reliable on, off, and dimming routine is usually more useful than repeatedly searching through an app for a preferred color. Secure the controller where it can be accessed without disturbing trim.
Reducing glare and maintaining nighttime visibility
Interior light should stay below the level that competes with the road scene. Avoid aiming LEDs toward the windshield, mirrors, instrument displays, or occupants’ faces. Reflections can appear only after dark, so evaluate the final result during a real nighttime drive while stationary first.
If the light feels noticeable after your eyes adjust, it is probably too bright or poorly aimed. Diffusion, indirect mounting, and lower output can preserve atmosphere without compromising visibility. Practical lighting should disappear into the background once the car is moving.
Evaluate costs, quality, and long-term maintenance
The purchase price is only one part of the project. Installation time, replacement adhesive, trim damage, and troubleshooting can change the final cost. A cheaper kit may be sensible for a small reversible experiment, while a full-cabin installation deserves more careful component review.
Typical prices for DIY lighting kits
DIY pricing varies with the number of zones, controller type, cable length, and whether the kit includes trim-specific pieces. A small footwell setup is generally simpler than a full dashboard, door, and rear-cabin installation. Compare what is actually in the box rather than comparing headline prices alone.
Check whether the package includes mounting hardware, connectors, fuses where applicable, and clear instructions. A product with fewer lighting zones but complete supporting parts may cost less to finish than a larger package that leaves essential items out.
Professional installation costs
Professional labor depends on access, routing complexity, the number of zones, and whether panels must be removed. Ask for a written scope that identifies the lighting locations, connection method, expected labor, and what happens if a connector or trim clip is damaged.
A professional quote is easiest to compare when it separates parts from labor. Confirm whether future removal or repair is practical, too. For broader context on finding local lighting installation services, a directory can help frame the questions to ask, even though vehicle work requires a specialist.
Signs of reliable LED components
Look for even illumination, secure connectors, flexible wire jackets, and mounting hardware suited to interior temperatures. Clear instructions should identify compatibility, power requirements, and controller behavior. Reviews can reveal recurring fitment or adhesive problems, but they should support rather than replace your own inspection.
A useful product comparison may include these details:
| Quality check | Better sign | Warning sign |
|---|---|---|
| Light output | Even brightness across a run | Hot spots or dark sections |
| Wiring | Flexible, protected cable | Brittle or exposed conductors |
| Connectors | Firm fit with strain relief | Loose or difficult-to-seat plugs |
| Instructions | Model-specific diagrams | Vague universal directions |
These checks help separate a complete installation package from a collection of attractive-looking components. They also give you a record to use if a part needs replacement later.
Troubleshooting flicker, heat, and connection issues
Flicker can come from a loose connector, an overloaded connection, damaged wire, or a controller problem. Turn the system off before inspecting it, then test one zone at a time. Heat, odor, discoloration, or repeated electrical faults are reasons to stop using the kit until the cause is identified.
If a strip lifts, clean and prepare the surface again rather than simply adding more adhesive over dust. Keep spare clips and compatible mounting tape with the vehicle’s other small accessories. Routine inspection during cleaning can catch loose wiring before it becomes a larger problem.
Conclusion
A successful Tesla interior lighting upgrade is less about filling the cabin with color than about choosing compatible parts, routing them carefully, and setting them for comfortable nighttime use. Measure first, protect the vehicle’s safety systems, test every zone, and spend for quality where access is difficult. The result should feel like a natural part of the interior rather than an accessory added afterward.
Frequently Asked Questions
Is an interior lighting upgrade worth it?
It can be worthwhile if you want a softer cabin atmosphere, better low-level visibility, or more personalization. The value depends on fit, installation quality, and whether the lighting remains comfortable during real nighttime driving.
Which interior lighting areas make the biggest difference?
Dashboard accents, footwells, and door areas usually create the most noticeable change. Start with one or two zones and expand only if the result remains balanced.
Should I choose white light or RGB lighting?
White light is simpler and often easier to keep subtle. RGB is more flexible, but it requires careful color and brightness choices to avoid reflections or visual distraction.
Can interior lighting damage the vehicle?
Poor routing or electrical connections can damage trim, wiring, or components. Avoid airbag paths, moving parts, sharp edges, and uncertain power connections, and follow the kit’s installation instructions.
How can I hide lighting wires?
Use existing seams and concealed trim channels, leaving controlled slack near moving panels. Never force a panel closed over a cable or route wires where clips, hinges, pedals, or seats can pinch them.
Do I need professional installation?
Not always. A reversible, clearly documented kit may suit a careful DIY installer, while extensive hardwiring or uncertain panel removal is better handled by someone experienced with automotive interiors.
How often should interior lights be checked?
Inspect them during normal interior cleaning and after any panel or door work. Look for loose adhesive, exposed wire, flicker, heat, discoloration, or changes in controller behavior.