

Key Takeaways
A good roof-rack setup starts with exact vehicle fitment, then balances cargo needs, installation, and careful driving.
- Confirm the vehicle generation, roof type, and mounting points before buying.
- Compare bar shape, mounting style, locks, pads, and included hardware.
- Keep the combined load within the lowest applicable limit.
- Follow the vehicle and rack instructions during installation.
- Remove and store the bars when you do not need them.
Understand Tesla roof rack cross bar compatibility
Choosing Tesla roof rack cross bars is less about finding a universal-looking set and more about matching the hardware to the vehicle. Model 3 and Model Y systems may look similar, but their mounting arrangements and approved components can differ. Vehicle production changes can also affect fitment. Treat the product instructions and vehicle-specific information as the final authority.
Model 3 versus Model Y fitment
Start with the exact model, model year, and body configuration. A bar set advertised for both vehicles may use different pads, clips, or fitting pieces for each one, so “fits Model 3 and Model Y” is not enough by itself. Check whether the listing identifies the precise generation and whether all vehicle-specific hardware is included.
A useful comparison is the Model 3 and Model Y rack system, whose listing describes a kit with two cross bars, towers, a fitting kit, keys, and instructions. That kind of component detail is more helpful than a generic statement about compatibility.
Glass roof and mounting-point requirements
Many glass-roof installations depend on concealed receivers beneath the roof seals rather than raised rails. The contact area must be clean and dry, and protective tape or pads may be needed where the feet meet the roof. Never assume that a smooth glass roof accepts clamp-on hardware in the same way as a vehicle with exposed rails.
Before fitting anything, inspect the roof for existing damage and read the instructions for the correct access points. A mounting clip that is only partly engaged can leave the bar appearing secure while creating movement, noise, or damage during travel.
Refresh, Highland, and trim-level differences
Names such as refresh or Highland can identify meaningful production changes, not merely cosmetic updates. Trim, year, and market can influence the fitting kit, the instructions, or the approved bar position. If a listing separates Highland from earlier Model 3 versions, follow that distinction rather than relying on photographs.
The same caution applies to newer Model Y versions. A current aluminum cross bar set lists separate installation guidance for Model 3, including Highland, and Model Y, including Juniper-era vehicles. Use such distinctions as a prompt to verify the exact application, not as a substitute for reading the supplied instructions.
How to verify compatibility before buying
Make a short record of the vehicle identification details before opening a product page: model, model year, body version, roof configuration, and market. Then compare those details with the rack’s fitment chart, included fittings, and load information. If any line is vague, ask the manufacturer or seller before ordering.
The roof-rack installation guide is also a useful reference for understanding the kind of vehicle-specific preparation involved. It describes cleaning the rooftop, applying anti-abrasion tape, engaging rail clips, and aligning the pads before the bars are installed. Those steps make clear why a universal fit claim deserves closer inspection.
Choose the right Tesla roof rack cross bars
Once fitment is settled, choose bars that suit the way you actually travel. A set for occasional skis does not need the same priorities as one carrying a box or wide water-sports equipment. Weight, noise, security, ease of removal, and carrier compatibility all matter. The quietest setup is not always the most useful if it limits the cargo you carry.
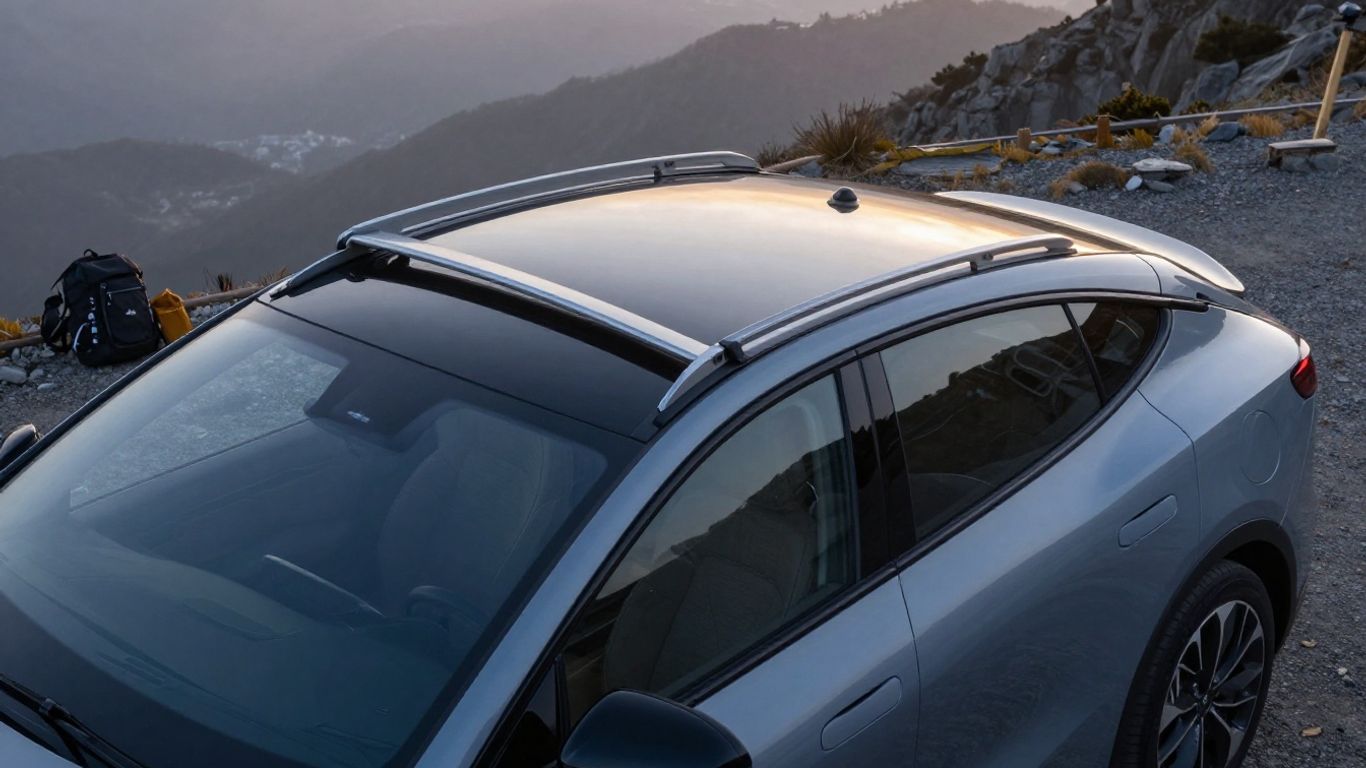
Factory bars versus aftermarket options
Factory bars usually offer a straightforward match with the vehicle’s mounting points and instructions. Aftermarket choices may offer different shapes, locks, prices, or accessory ecosystems. The comparison should focus on documented fitment and included parts rather than appearance alone.
Read the warranty terms, installation method, replacement-part availability, and return conditions. The lockable cross bars listing, for example, describes an option for Model 3 or Model Y carrier rails and states its own warranty and return conditions. Those details belong in the buying decision, but they do not replace checking your vehicle’s application.
Aluminum construction and aerodynamic shapes
Aluminum bars are commonly chosen for their lighter weight, while shaped profiles can reduce the blunt airflow produced by a square bar. Neither feature makes a rack automatically suitable for every load. Look for the bar’s dimensions, surface design, maximum load, and compatibility with the carriers you intend to use.
A fair comparison also includes the feet and fittings, since the complete system—not the bar tube alone—affects weight and roof contact. If the product information gives a total system capacity, use that figure rather than estimating from the material.
Clamp-on, fixed-point, and flush-mount designs
Clamp-on systems grip a defined roof edge or door frame, while fixed-point systems connect to prepared receivers under trim or seals. Flush-mount bars sit close to the roof and can look tidy, but their low profile may affect the clearance available for certain accessories. The design must match the vehicle’s approved mounting method.
Check how the bar is removed, whether the doors or seals are involved, and whether the carrier clamps have enough room. A sleek bar that leaves too little clearance for an accessory can be less practical than a slightly taller design.
Locking systems, pads, and included hardware
A lock can discourage casual removal, but it does not replace a proper inspection of the mounts. Pads, protective tape, clips, keys, torque tools, and covers all affect how complete the kit is on opening the box. Make an inventory before installation and identify any parts that differ between the front and rear positions.
If the instructions specify a particular tool or tightening sequence, use it. Substituting hardware because it looks similar can change how the load reaches the roof and may prevent the feet from seating correctly.
Match the cross bars to your cargo needs
Bars are only one part of a rooftop carrying system. The carrier, box, straps, and cargo all add weight and height, and each can change the airflow around the vehicle. Decide what you carry most often before choosing accessories. A flexible setup is valuable, but only when every component remains within its own limits.
Ski, snowboard, and bike carrier compatibility
Ski and snowboard carriers generally need enough bar width and clearance for their clamps, while bike carriers may require a specific channel or clamp arrangement. Check whether the accessory attaches around the bar or slides into a channel. Then account for the carrier’s own weight and the number of items it holds.
Bikes can create a tall, uneven load, especially when mounted upright. Remove loose accessories where appropriate, secure wheels and frames according to the carrier instructions, and recheck the rack after the first short drive.
Cargo boxes and rooftop bags
A cargo box benefits from two properly spaced bars and enough clearance for its mounting hardware. Confirm that the box can open without striking the hatch, antenna, or roof, and position the load so it does not exceed the bar or vehicle limit. Rooftop bags need careful protection from abrasion and must be secured without placing straps where they can interfere with doors or seals.
The lightweight aluminum rack is presented for equipment such as bikes, surfboards, and kayaks, but any accessory still needs its own fitment check. Product descriptions can identify intended uses; the installation and load instructions determine whether a particular combination is appropriate.
Kayaks, paddleboards, and other oversized gear
Long or wide equipment needs more than a quick strap-over-the-top approach. Use a carrier designed for the shape, add front and rear tie-downs when the instructions call for them, and protect contact points from rubbing. Check the load from every angle before moving the vehicle.
Wind can catch a paddleboard or kayak and place unusual forces on the bars. Stop soon after departure to inspect the straps and mounts, then repeat the check whenever weather or road conditions change.
Weight limits for bars, carriers, and the vehicle roof
The effective limit is the lowest applicable number among the vehicle roof, cross bars, carrier, box, and attachment hardware. Do not count only the cargo. A box, bike carrier, or kayak cradle contributes to the total, as do straps and other installed accessories.
This simple table helps separate the figures that are often confused:
| Load figure | What it includes | Where to verify it |
|---|---|---|
| Bar-system limit | Cross bars, feet, and fitting hardware | Rack instructions |
| Carrier limit | The accessory and its permitted cargo | Carrier instructions |
| Vehicle roof limit | The complete rooftop load | Vehicle documentation |
| Combined traveling load | Bars, carrier, cargo, and accessories | Lowest applicable limit |
After weighing the complete setup, leave a sensible margin rather than loading right to the maximum. Recheck the total when switching from a light bike carrier to a larger box or water-sports cradle.
Install Tesla roof rack cross bars correctly
Installation is a careful sequence, not a job to rush through in a driveway. Clean contact surfaces, identify every corner, and keep the parts organized before placing a bar on the roof. The exact measurements and hardware vary by system, so use the supplied instructions for your vehicle. A calm installation protects both the glass and the rack.
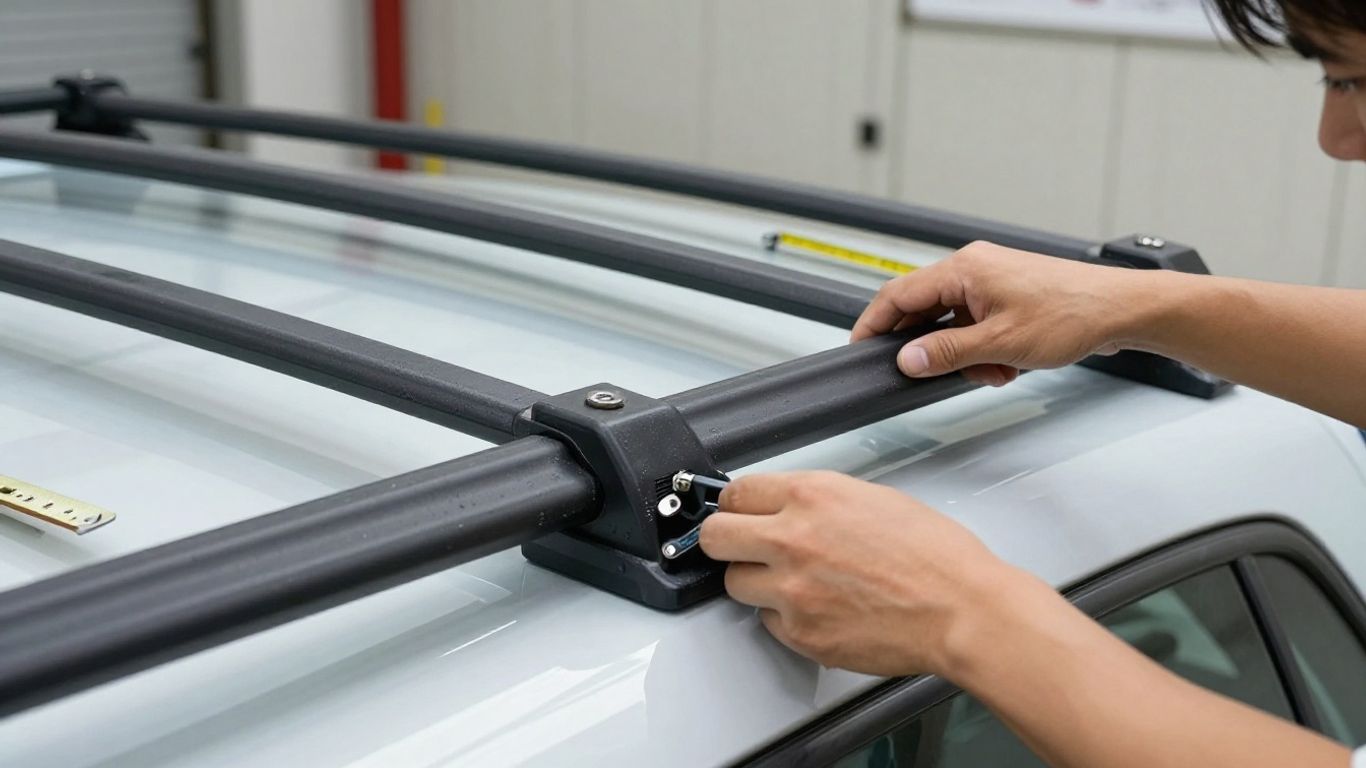
Tools and preparation before installation
Gather the specified wrench, clip tool, measuring aid, protective tape, pads, and a clean cloth. Work in good light on a dry roof, and place small hardware where it cannot roll onto the glass or disappear under the vehicle. Photographing the parts before assembly can help if front and rear pieces look alike.
Wash away grit around the mounting locations and let the surface dry fully. Dirt trapped beneath a pad or seal can act like abrasive dust as the rack moves under load.
Locating and accessing the mounting points
Follow the roof arrows, trim marks, or other reference points in the instructions rather than estimating from the windshield or doors. Some systems require carefully retracting a rubber seal to expose a receiver. Insert each clip fully, then gently pull and wiggle it to confirm engagement before fitting the pad.
The DIY roof-rack instructions describe this general sequence in detail, including rooftop cleaning, anti-abrasion tape, rail clips, and pad placement. Use the measurements and corner labels for your exact system; do not transfer them casually to another model or production version.
Positioning the front and rear bars
Identify the front and rear bars before lifting them onto the roof. Place each foot over its matching pad or clip, keep the bar square to the vehicle, and confirm that all hooks remain upright and engaged. Measure the spacing if the instructions specify it, since bar position affects both load distribution and hatch clearance.
Step back and view the rack from the front and rear. Small alignment errors are easier to correct before the hardware is tightened than after the feet have settled under tension.
Tightening hardware and checking alignment
Tighten gradually and alternate between sides so the bar seats evenly. Stop at the specified torque or tightening point; more force is not a safer installation. Over-tightening can damage fittings or the glass roof, while under-tightening can allow movement.
Before loading anything, test the bars with firm hand pressure and inspect the seals and pads. If the rack shifts, sits unevenly, or produces an unexpected gap, remove the load and resolve the issue before driving. The roof rack fitting kit is described as including installation instructions and locking components, illustrating why the complete kit should be checked before work begins.
Drive safely with roof rack cross bars
A correctly installed rack changes the vehicle’s profile and handling. The added height, mass, and exposed surface can affect braking, cornering, wind response, and energy use. Drive conservatively at first and listen for new sounds. Stop somewhere safe if anything seems loose or unusual.
Understanding speed and load restrictions
Use the most restrictive speed and load guidance supplied for the vehicle, bars, carrier, and cargo. If a box or bike carrier has a lower limit than the bars, the accessory limit controls. Do not treat a maximum figure as a target, especially with a tall or irregular load.
Recheck fasteners after the initial drive and periodically during a long trip. A short inspection is easier than dealing with a shifted carrier on the roadside.
Reducing wind noise and aerodynamic drag
Some airflow noise is normal, particularly when the bars are empty. Fairings, covers, or a different bar profile may change the sound, but only use parts approved for the system. Keep unused channels covered where the instructions call for it and remove the bars when they are no longer needed.
Noise that suddenly becomes louder deserves attention. It can indicate a loose cover, a displaced seal, or a bar that has moved from its intended position rather than being merely an aerodynamic annoyance.
Protecting the roof and cargo from movement
Use the carrier’s specified clamps and straps, and keep straps flat rather than twisted. Secure loose ends so they cannot flap against the roof or windows. Soft protective material can help prevent rubbing, but it must not interfere with the mounting hardware or seals.
A load should not rock independently when tested by hand. If it does, adjust the attachment before leaving, then inspect it again after the first few miles.
Adjusting driving for height, weight, and weather
Remember the new total vehicle height at garages, covered fuel stations, low branches, and drive-through lanes. Heavy cargo can make acceleration and braking feel different, while crosswinds can push broad items sideways. Rain, snow, ice, and strong wind call for lower speeds and more frequent checks.
Plan stops around the conditions rather than the clock. The safest rack trip is one where the driver has enough time to respond to movement, changing weather, and unfamiliar clearance.
Maintain and remove your Tesla roof rack cross bars
Roof-rack care is mostly routine inspection and sensible cleaning. Check the system before each substantial trip, especially after carrying a large or flexible load. Removing the bars when they are not needed can reduce exposure to weather and road grime. It also gives you a chance to inspect the roof contact areas directly.
Inspecting mounts, seals, and fasteners
Look for cracked pads, displaced seals, bent clips, missing covers, and corrosion around fasteners. Press gently on each foot and compare the left and right sides for movement. Any change from the original installation deserves attention before the next trip.
Inspect the cargo carrier separately. A secure bar cannot compensate for a worn clamp, split strap, or damaged cradle.
Cleaning after rain, snow, and road salt
Rinse salt and grit from the bars, feet, channels, and exposed hardware with clean water. Use a mild cleaner that is suitable for the materials, then dry the surfaces before storage. Avoid forcing debris deeper into seals or applying products that could make pads slippery.
After winter driving, pay special attention to small crevices around locks and clips. Clean, dry hardware is easier to inspect and less likely to seize.
Troubleshooting noise, looseness, and leaks
A new rattle may come from a cover, carrier, strap, or mounting foot. Remove the cargo first, then test each part separately. For looseness, revisit the installation sequence and tightening specification rather than simply adding force. Water entry around a seal calls for immediate inspection of the clip, pad, and roof contact area.
Do not continue driving with a problem you cannot identify. A rack that seems acceptable at low speed may behave differently once wind and cargo loads increase.
Storing the bars when they are not in use
Remove the system carefully and keep the hardware grouped by corner or position. Clean and dry the bars before wrapping them in a soft covering, then store them somewhere cool and dry. Keep the instructions and keys with the rack so the next installation does not become a guessing exercise.
Avoid stacking heavy objects on the bars or leaving small clips loose in a box where they can scratch the finish. A simple labeled container protects the parts and shortens the next setup.
Conclusion
The right Tesla roof rack cross bars are the ones that match the exact vehicle, carry the intended equipment within the strictest limit, and remain easy to inspect. Take time with fitment and installation, drive with the added height and wind load in mind, and remove the system when it is not serving a real purpose.
Frequently Asked Questions
Can any cross bars fit both Model 3 and Model Y?
No. Some systems are designed for both vehicles, but the pads, clips, fitting kits, and approved positions can differ. Confirm the exact model and production version before buying.
Do glass-roof vehicles need special roof-rack hardware?
Often, yes. A glass roof may use concealed mounting receivers, protective tape, pads, and clips beneath the roof seals. Follow the instructions for the specific vehicle and rack.
Should I choose aluminum or steel cross bars?
Compare the complete system’s weight, load rating, shape, corrosion resistance, noise, and carrier compatibility. Material alone does not determine whether a rack is suitable.
Can I carry a cargo box and bikes together?
Possibly, if the bars, carriers, vehicle roof, spacing, hatch clearance, and combined load all permit it. Add the weight of every component before loading.
How often should roof-rack fasteners be checked?
Check them before each substantial trip and again after the first short drive with a new installation or load. Recheck them whenever the rack is exposed to severe weather or unusual movement.
Why do roof bars make noise?
Airflow around the bar, covers, channels, carriers, and cargo can create noise. A sudden rattle or increase in sound may indicate looseness or a displaced part and should be investigated.
Is it better to remove cross bars when they are not needed?
Usually, removal limits exposure to weather, dirt, and unnecessary aerodynamic drag. Store the clean, dry system with its hardware and instructions for the next use.